
Customizing notifications for individual portals
PYou can override the global notification settings for individual client portals. Each portal can have its own email content, subjects, recipients, and digest schedules.
If you don't configure portal-specific notifications, the portal automatically uses the global settings from Client Portal Settings → Notifications.
When to use per-portal notifications
Portal-sepcific notification customization is useful when:
Different clients need different communication styles or branding
You want to disable certain notifications for specific portals (e.g., no digest emails for VIP clients)
A portal requires custom email content that doesn't fit the global template
You need to send notifications to different recipients for different portals
Setting up portal-specific notifications
Follow these steps to customize notifications for a specific portal:
From your WordPress dashboard, go to Portals in the sidebar
Click on the portal you want to customize
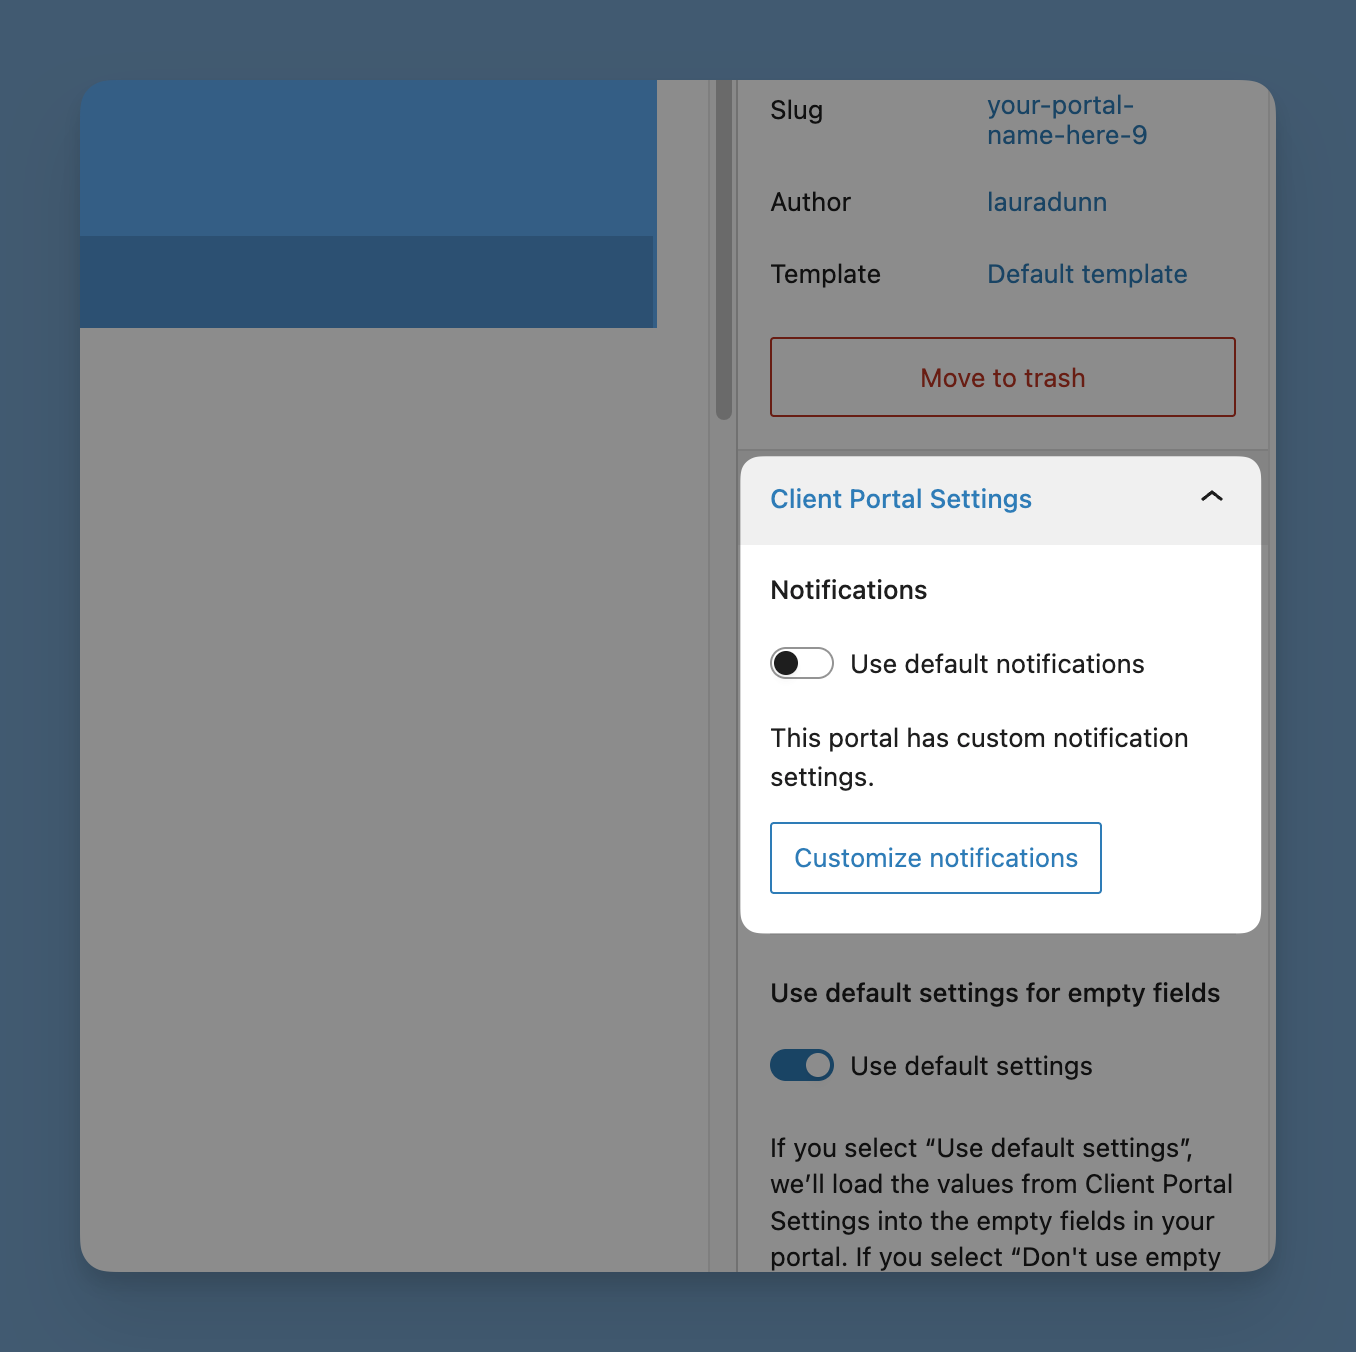
In the sidebar on the right, locate the Notifications panel under Client Portal Settings
Uncheck the box labeled Use default notifications
Click the Customize notifications button — this opens the per-portal notification settings page in a new tab
You'll see a notice at the top of the page confirming these settings will override the global defaults for this specific portal.
Configuring notification sections
The custom settings page has the same sections as the global settings:
General — Core settings for testing and previews
Digest — Batch notifications into scheduled emails
Reminder — Due date reminder settings
Client Created — Notification when a new client is added
Portal Created — Notification when the portal is published
Module Activated — Notification when a module status changes to "Active"
Module Completed — Notification when a module is marked complete
New Comment — Notification when a new comment is added on a content page
Client Uploaded — Notification when a client uploads a file
For each section you want to customize:
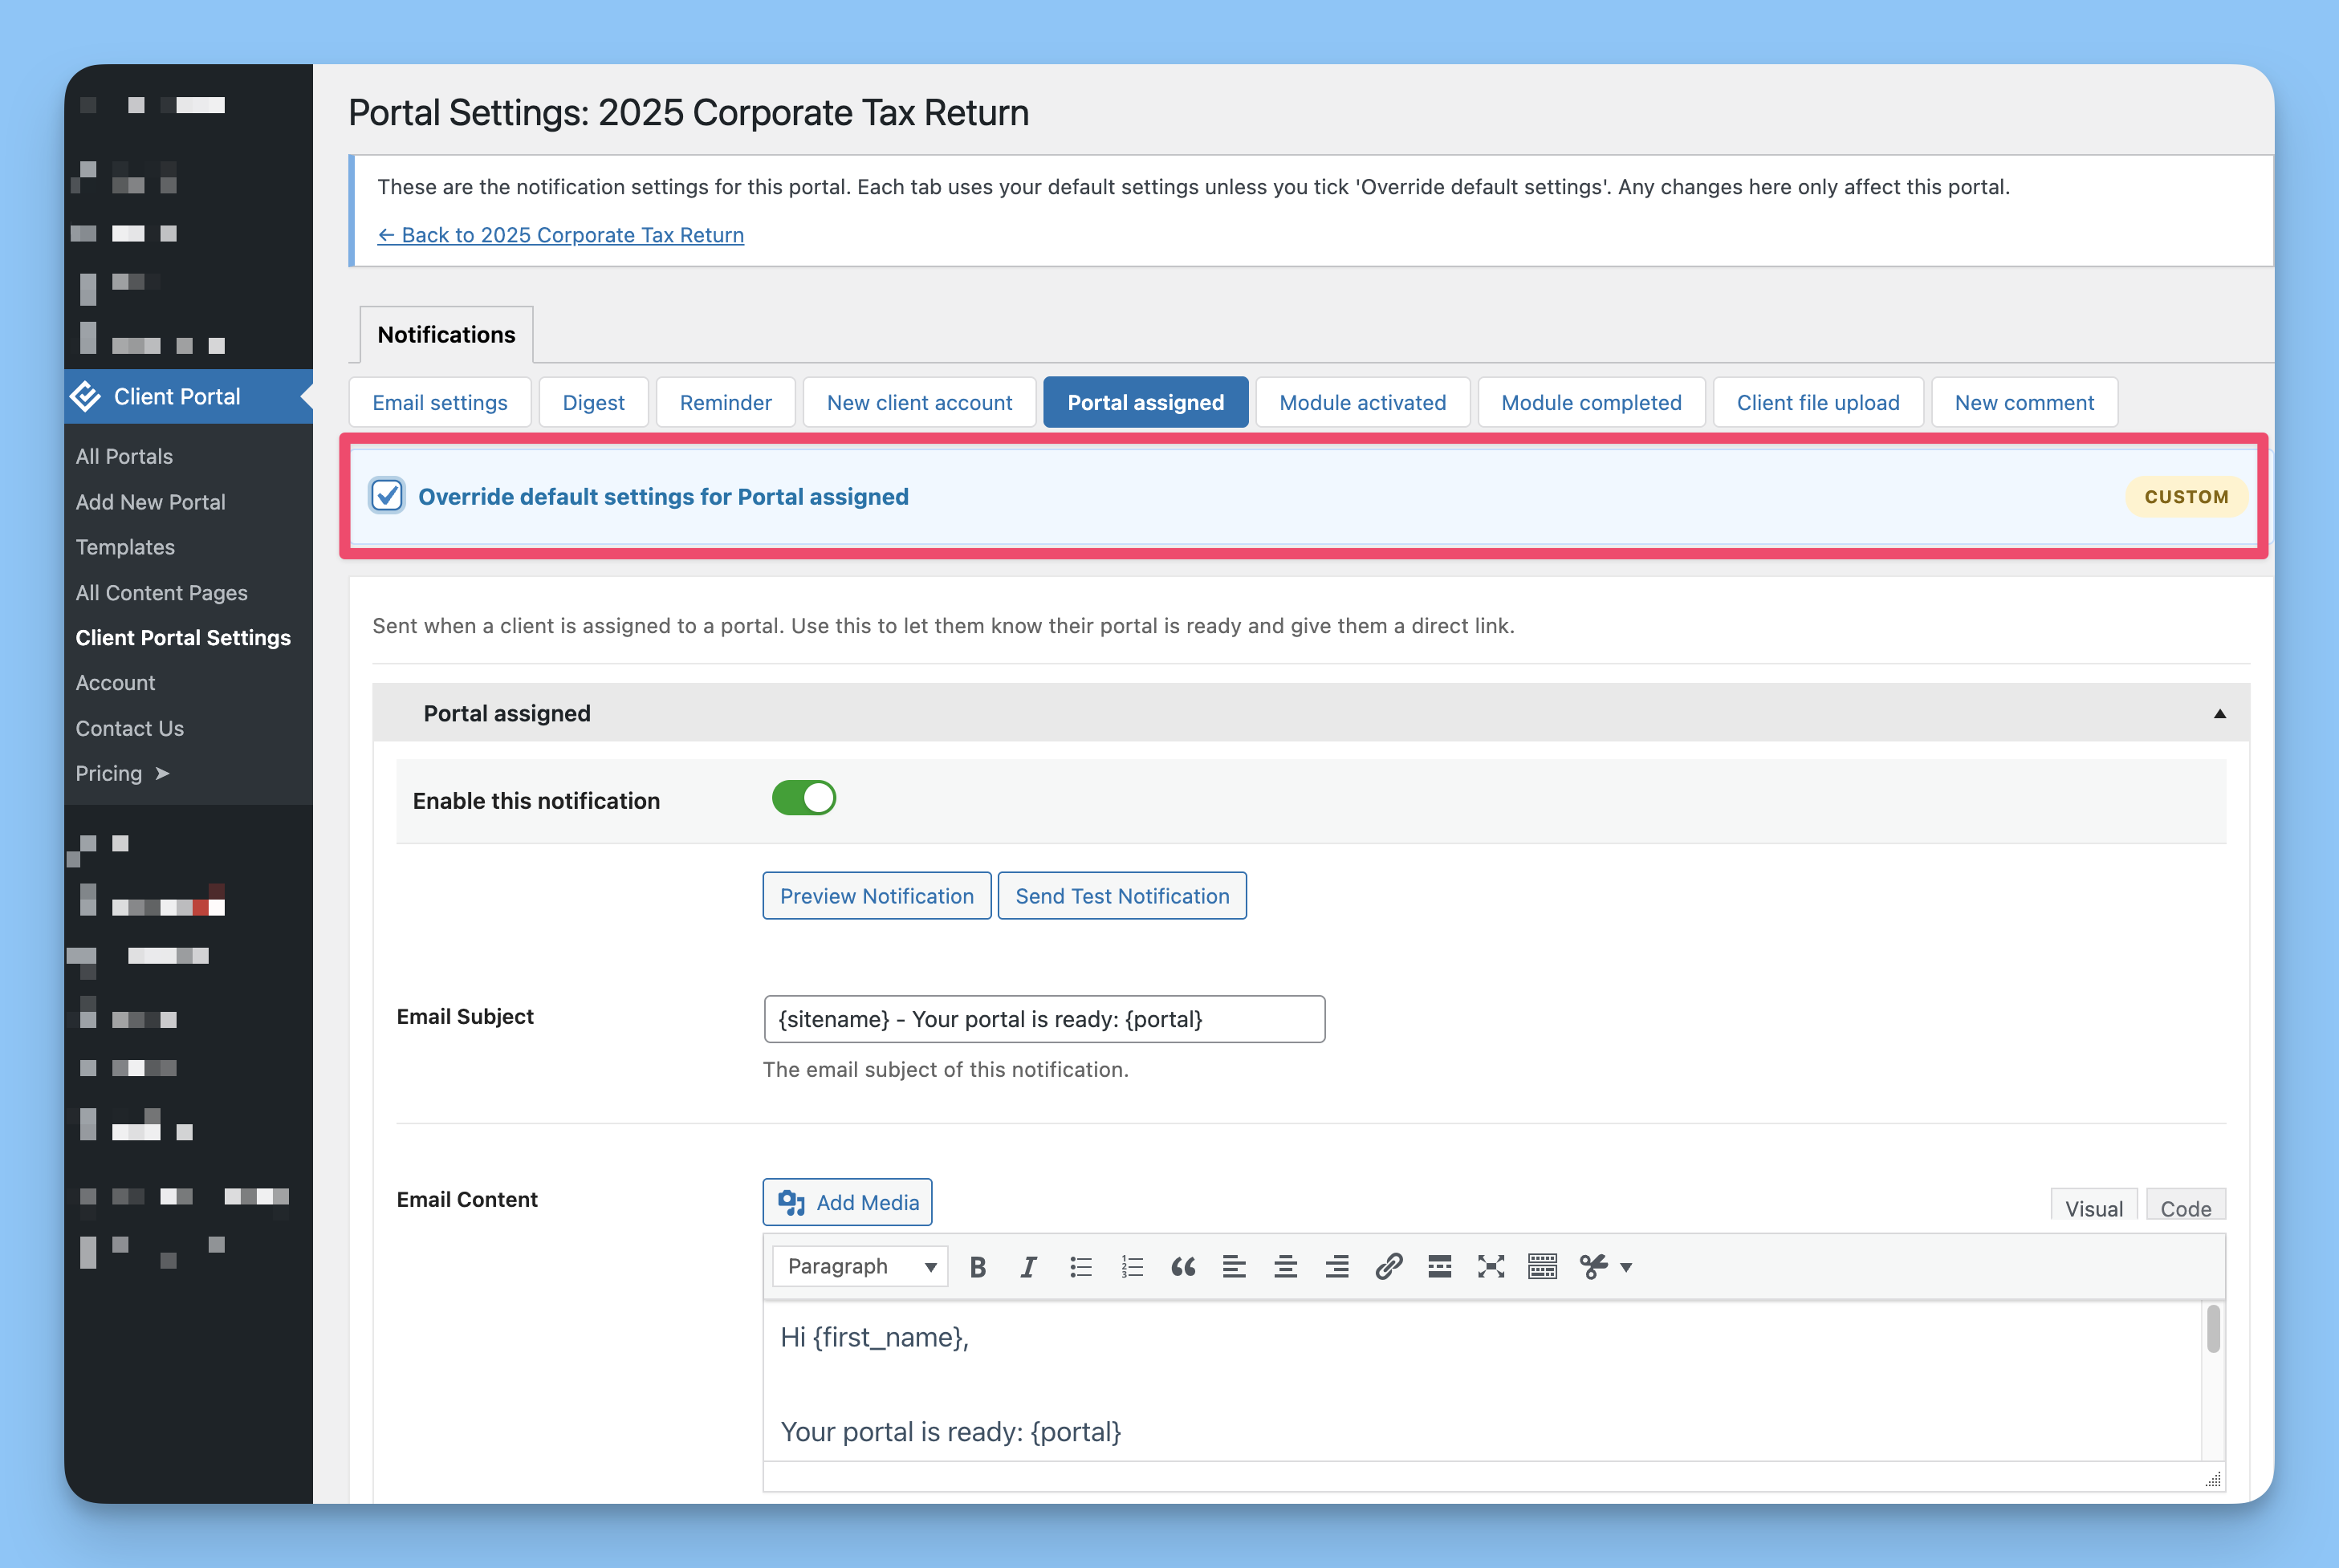
Navigate to that section's tab (e.g., click Module Activated)
Check the box labeled Enable per portal settings for [Section Name]
Once enabled, you can edit:
Email Subject — Custom subject line for this portal
Email Content — Custom message body with template tags
Recipients — Choose who receives this notification (admin email, clients, or both)
Click Save Changes when done
If you don't check "Enable per portal settings" for a section, that section will continue using the global settings — even if you've turned off "Use default notifications."
Customizing digest schedules for individual portals
Each portal can have its own digest schedule, independent of the global settings:
Go to the Digest tab in the per-portal settings
Check Enable per portal settings for Digest
Set your preferences:
Schedule on Day — Choose daily, weekly (specific day), or None to disable
Schedule on Time — Choose when the digest sends (e.g., 09:00)
Configure the email subject, content, and recipients
Save changes
The digest will batch notifications for Client Created, Portal Created, Module Activated, Module Completed, and Client Uploaded events. Reminder notifications are always sent immediately and never included in digests.
For more details on how digests work, see Collate notifications into digests.
Managing recipients for individual portals
For each notification type, you can choose different recipients per portal:
Admin (you) — Sends to your WordPress admin email address (you can change this email address in Client Portal Settings → Notifications → Email settings).
Client(s) on this portal — Sends to the client(s) assigned to this portal
You can select one, both, or neither. If no recipients are selected, that notification won't send for this portal.
Testing portal-specific notifications
After configuring per-portal settings, test them to verify they work:
Navigate to the notification section you customized (e.g., Module Activated)
Click Send Test Notification
Check your inbox for the test email with your custom content
Test emails use sample data for template tags, so you'll see placeholder values instead of real portal/client names.
Reverting to global settings
To stop using custom notifications and return to global defaults:
Edit the portal
In the Notifications panel, check the box labeled Use default notifications
Update the portal
You can also revert individual sections by unchecking "Enable per portal settings for [Section]" in the per-portal settings page. This lets you keep custom settings for some notifications while using global settings for others.