
Importing and exporting portals
Export your portal data to move it to a new website, create backups, or duplicate portals across multiple sites. This guide covers exporting portals, templates, and content pages, then importing them using WordPress's built-in tools.
Before you export or import, backup your WordPress website. Imports cannot be undone.
What gets exported
When you export Client Portal data, the following information is included:
Portals (projects) – All portal content, phases, modules, and configurations
Templates – Custom portal templates you've created
Content pages – Standalone content pages used in portals
Attachments – Files stored in your WordPress Media Library
Portal settings – Due dates, statuses, phase/module configurations, and navigation menus
What's NOT included
The following data is excluded from exports:
Client users and accounts – For privacy reasons, user data is not exported
Messages and notifications – Communication history is excluded
Private/client-uploaded files – Files uploaded by clients outside the Media Library won't transfer automatically (see below)
After importing, you'll need to manually create client users and assign them to portals.
Exporting your portal data
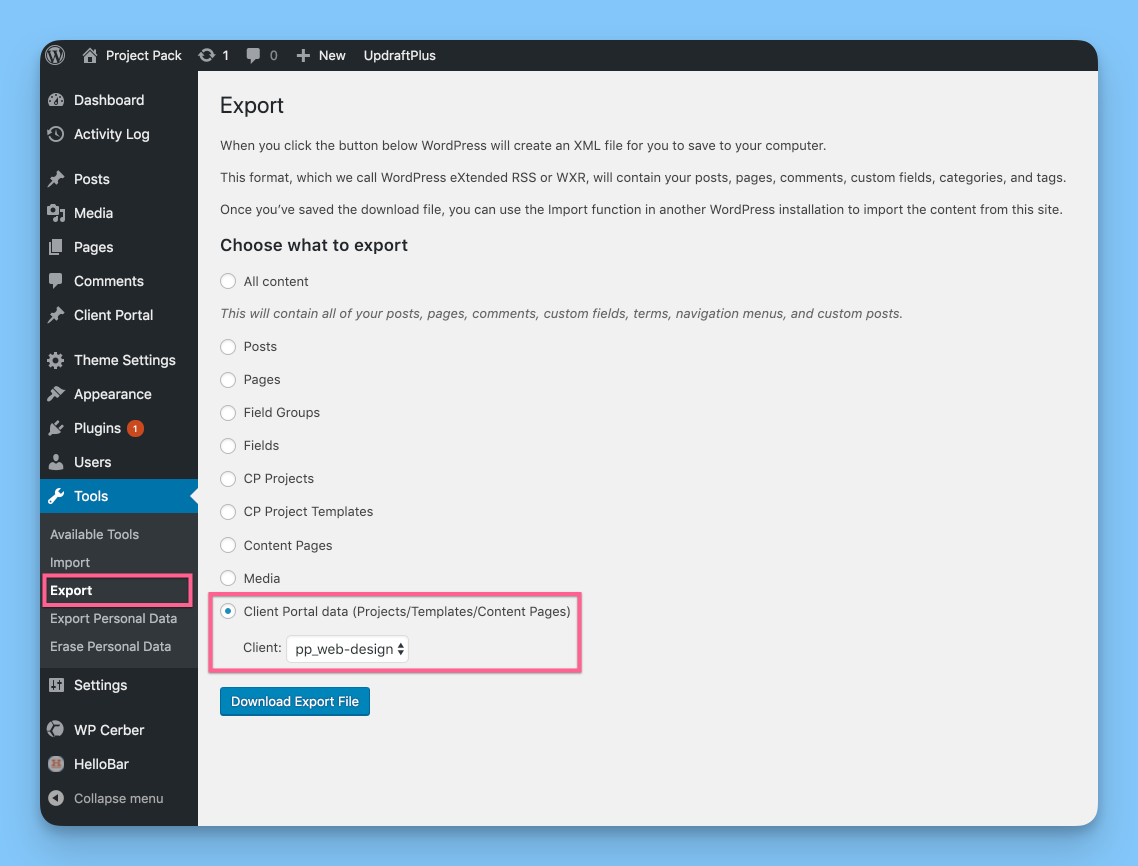
Navigate to Tools → Export in your WordPress admin.
Select the "Client Portal data (Projects/Templates/Content Pages)" radio button.
In the "Client:" dropdown, choose:
"All Clients" to export all portals
A specific client to export only their portals
Click "Download Export File".
Your browser will download an XML file named something like yoursite.wordpress.2024-01-15.xml.
To export a single portal, temporarily create a new user and assign them to only that portal, then export data for that specific client.
Handling large exports
If you have many portals or large attachments, the export may timeout or produce an empty file. If this happens:
Export one client at a time instead of "All Clients"
Contact your hosting provider to increase PHP memory and execution time limits
Consider compressing large images before exporting
Importing your portal data
Install the WordPress Importer
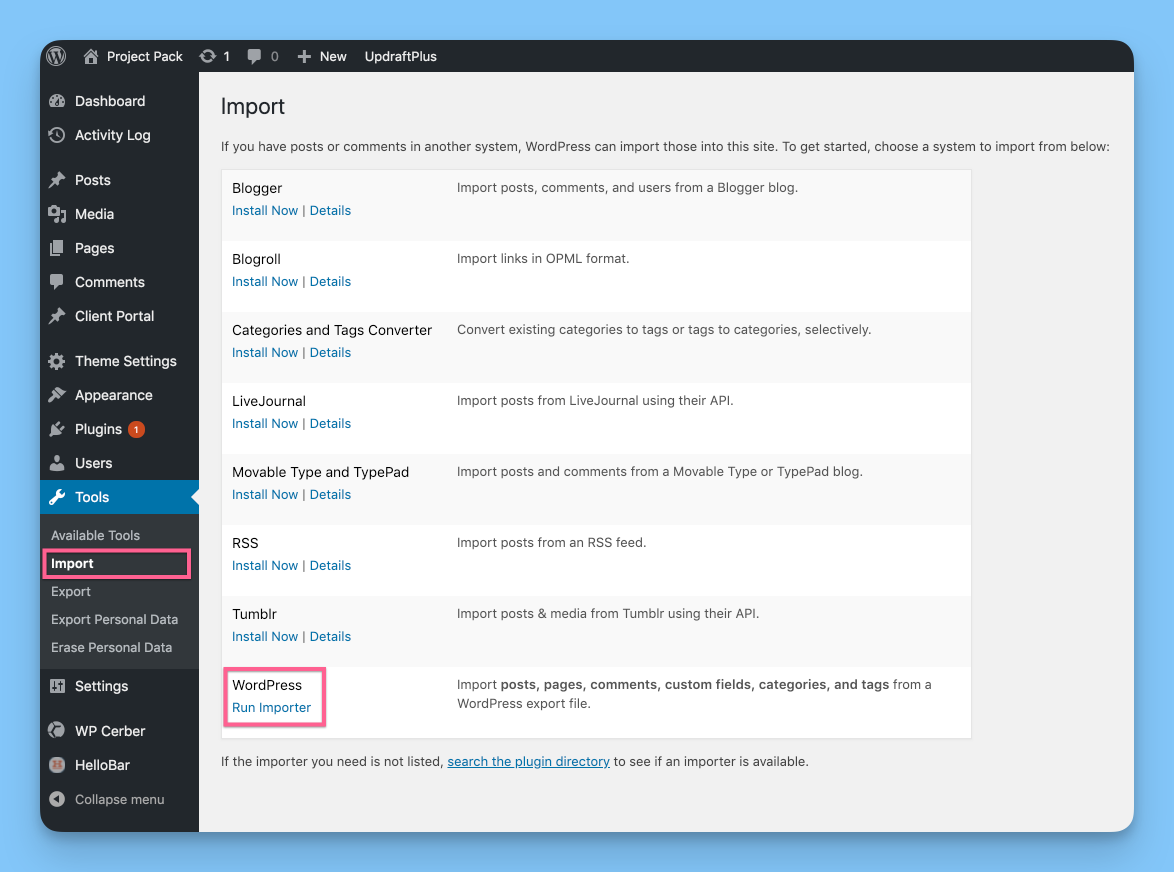
Navigate to Tools → Import.
Find "WordPress" in the list and click "Install Now" (skip this if already installed).
After installation, click "Run Importer".
Upload and import the file
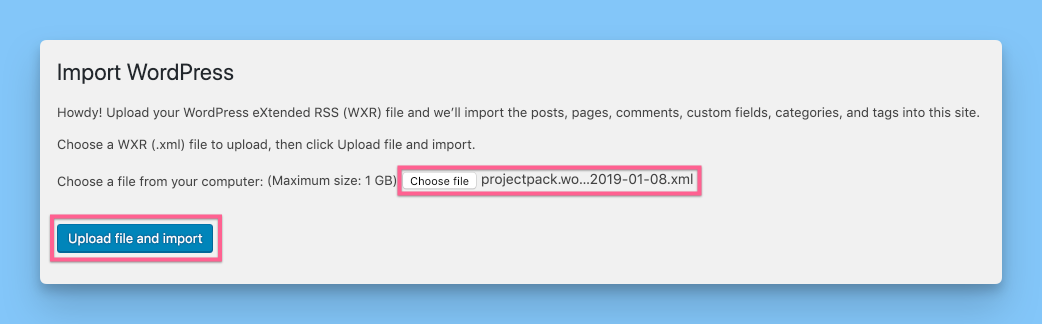
Click "Choose File" and select the XML file you exported.
Click "Upload file and import".
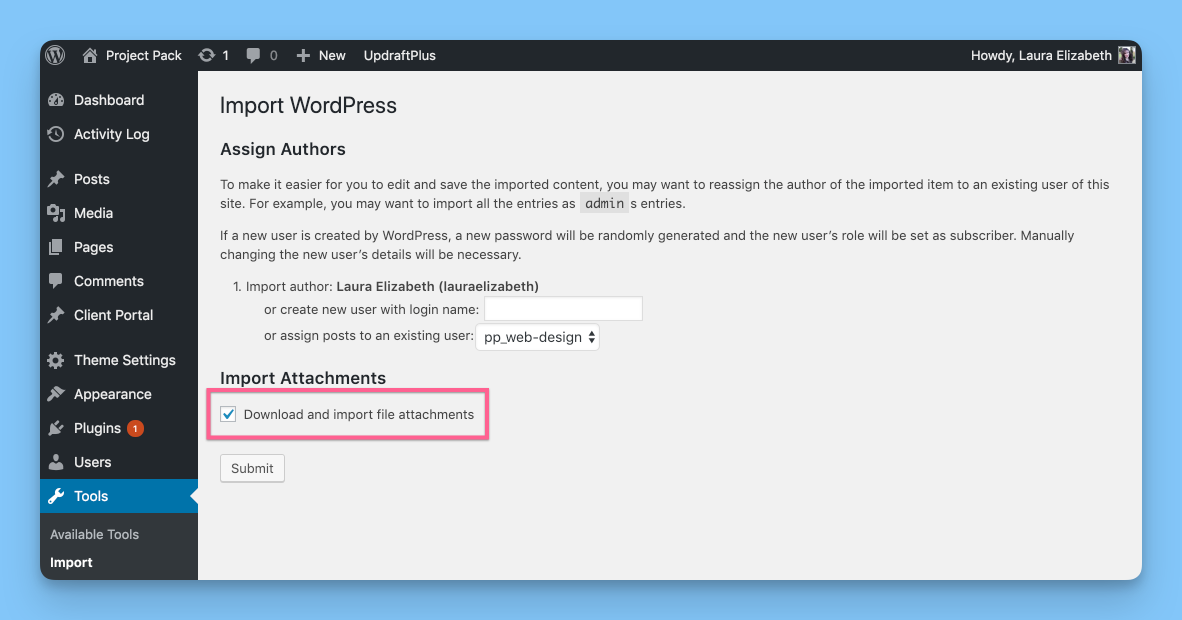
On the next screen, assign an author for the imported content. This is usually you (the administrator), or you can create a new user.
Important: Check the box labeled "Download and import file attachments". This ensures files are transferred.
Click "Submit".
The import process may take several minutes depending on how much data you're importing.
If portals contain many large attachments, the import may timeout. WordPress typically handles files up to 50MB total, but this varies by hosting provider. If attachments fail to import, you'll need to upload them manually.
After importing: assign clients
Since client users aren't included in exports, you'll need to create users and assign them to the imported portals:
Go to Users → Add New and create client accounts (or use existing ones).
Navigate to Posts → All Posts and filter by post type to find your portals.
Edit each portal and assign the appropriate client user.
Handling private files and client uploads
Files uploaded using the Private Files module or uploaded by clients are stored in a special protected directory outside the WordPress Media Library. These files are not automatically transferred during import.
To transfer these files manually:
On your original site, locate the
/wp-content/uploads/leco-cp/folder.Copy this entire folder to the same location on your new site using FTP or your hosting file manager.
Verify file permissions are set correctly (typically 644 for files, 755 for folders).
Learn more about how Client Portal handles different file types in our guide on private files vs regular files.
Troubleshooting common issues
Attachments show "Failed to import"
This happens when files are inaccessible from the original site or exceed size limits. To fix:
Manually upload missing files to the Media Library on the new site
Update portal content to reference the new file URLs
Check that "Download and import file attachments" was checked during import
Portals imported but clients can't see them
Client users aren't imported automatically. Make sure you've:
Created client user accounts on the new site
Assigned those users to the imported portals
Verified users have the "Client" role
Private uploaded files return 404 errors
Files from the Private Files module or client uploads must be manually copied to the new site's upload directory. Follow the steps in "Handling private files and client uploads" above.
Best practices
Test on staging first – Import to a staging site to verify everything works before going live
Keep export files secure – XML files contain portal content and should be stored safely
Document client assignments – Before exporting, note which clients are assigned to which portals to make reassignment easier
Export regularly – Create periodic backups in case you need to restore portal data