
Enable comments in your portals
Client Portal supports comments on Content Pages when using the Block Editor. This lets your clients leave feedback and discuss specific content directly within their portal.
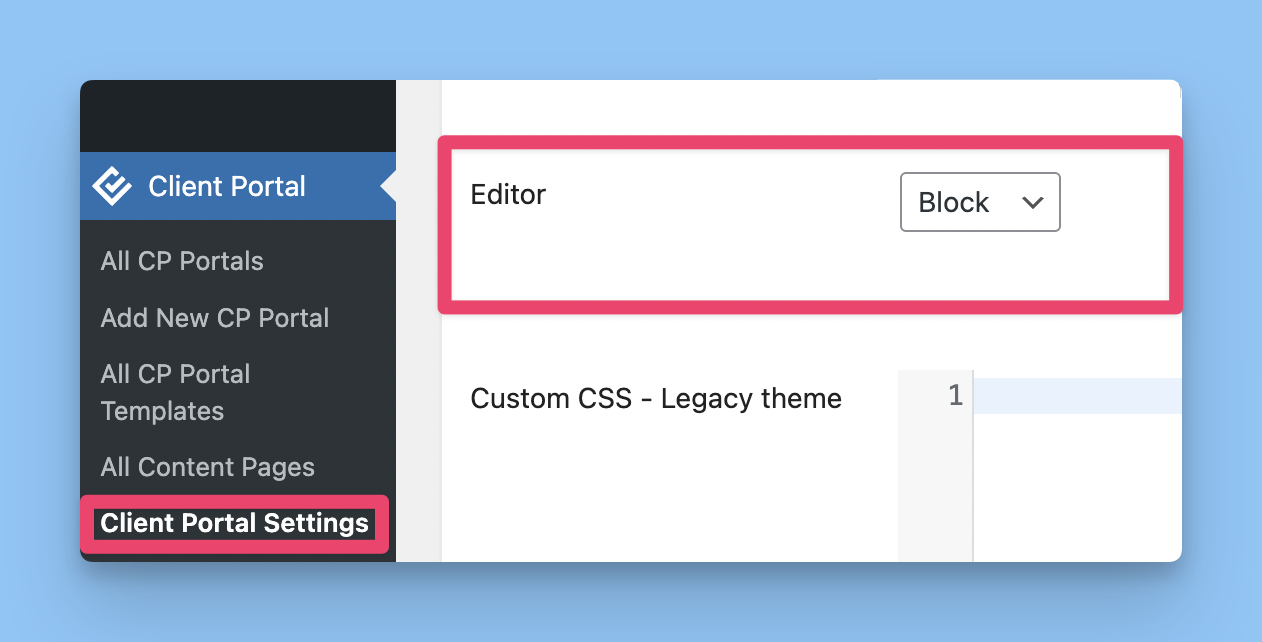
Before you begin: Set your Editor to "Block" in Client Portal settings (Client Portal → Settings) and ensure comments are enabled globally in your WordPress settings.
How comments work
Comments on Content Pages are different from regular WordPress comments in a few important ways:
Portal-specific: Comments only appear when clients view the Content Page through a specific portal, keeping conversations private and relevant to each project
One portal only: Content Pages with comments enabled can only be attached to one portal at a time (unlike regular Content Pages which can be used across multiple portals)
Block Editor required: The comments feature only works with the Block Editor, not with page builders
Enable comments on a Content Page
To turn on comments for a Content Page:
Go to Client Portal → Content Pages in your WordPress admin
Edit an existing page or create a new one
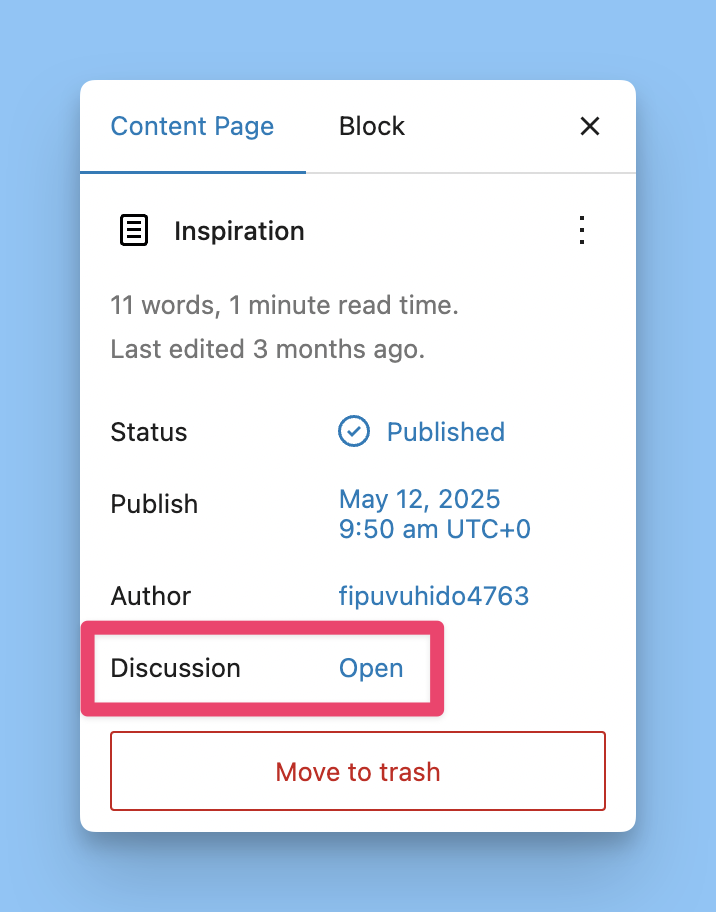
In the editor sidebar on the right, find the "Discussion" panel
Click "Discussion" and select "Open" to allow comments
Publish or update the page
You can also create a new Content Page directly from the portal editor by clicking "Create new Content Page" when adding a module. Most users find this faster since you're already working in the portal where the page will be used.
Recommended settings in WordPress Discussion
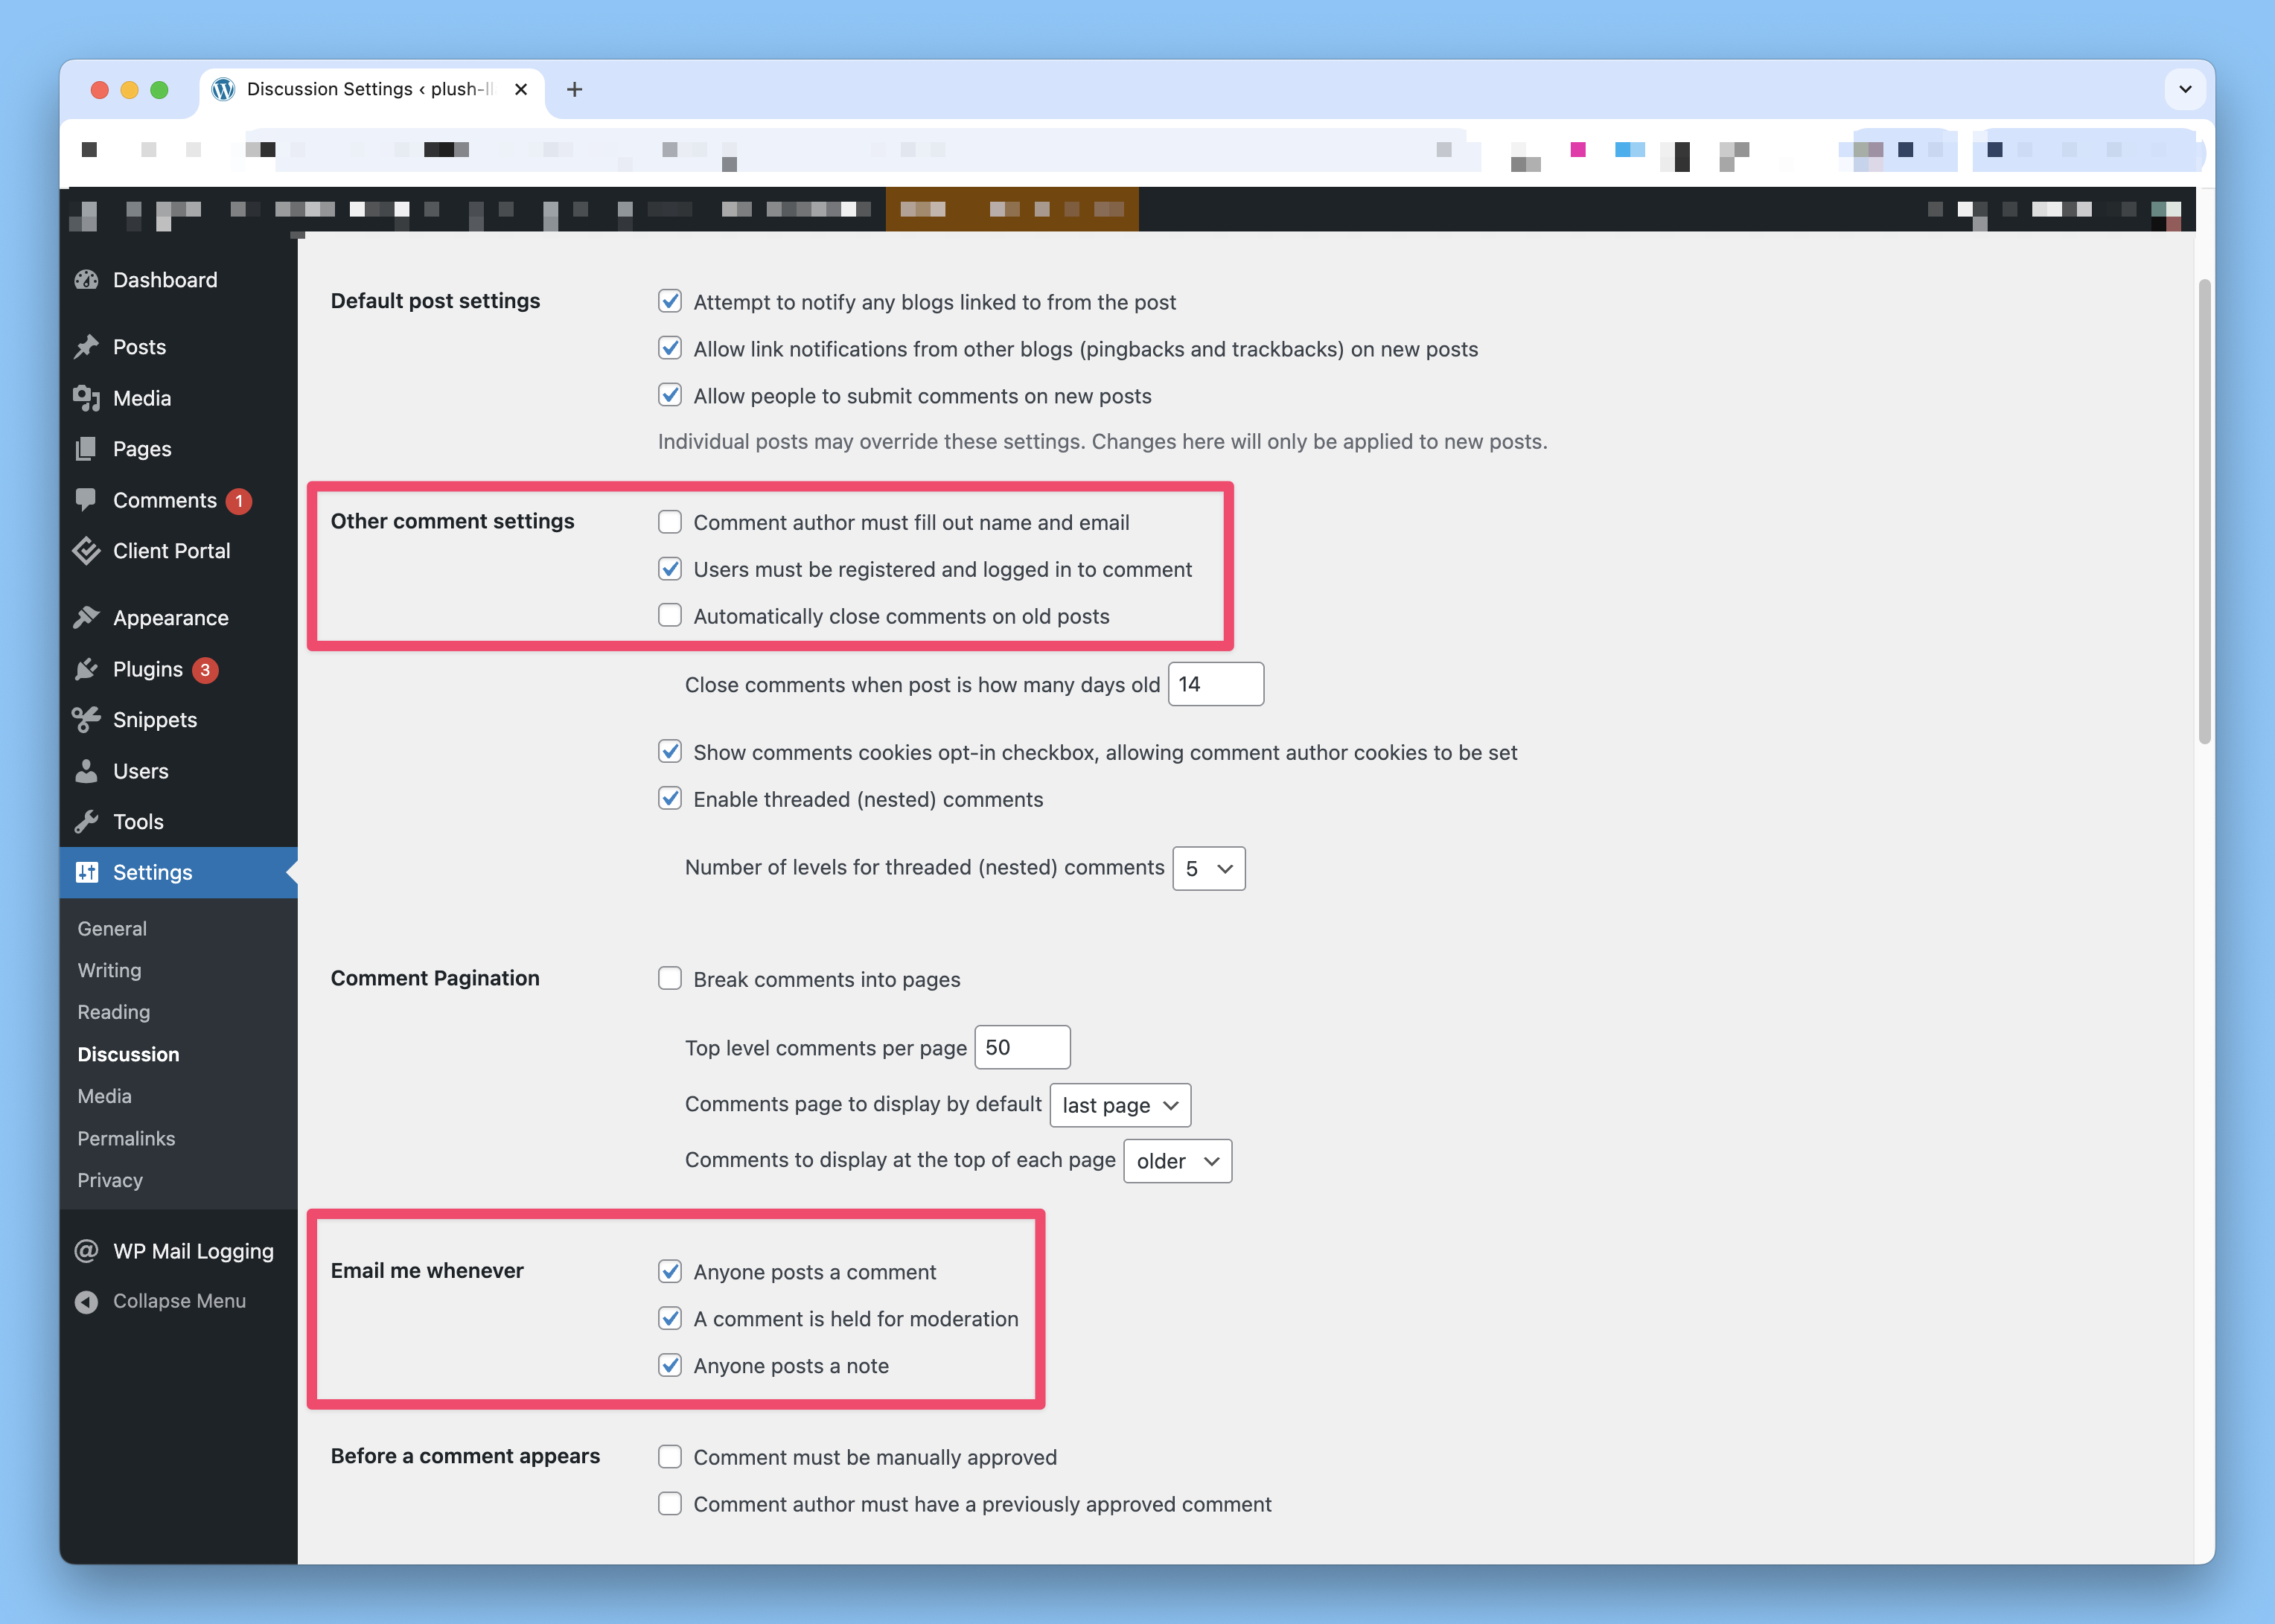
Client Portal comments use WordPress comments, so your portal comment experience also depends on the settings in Settings → Discussion.
For most private portals, we recommend turning on Users must be registered and logged in to comment and leaving both moderation options turned off. This keeps comments tied to logged-in users and makes it easier for clients to have a normal conversation without waiting for approval.
If you want more control, you can change that setup:
Turn on manual approval if you want to review every comment before anyone sees it.
Turn on previously approved comment if you want to moderate the first comment from each person, then allow future comments automatically.
Leave the login requirement off only if you want a more open comment flow. In most Client Portal setups, this is not needed.
If you require approval, clients will see a moderation notice after posting and their comment will stay hidden until it is approved.
Comment notifications
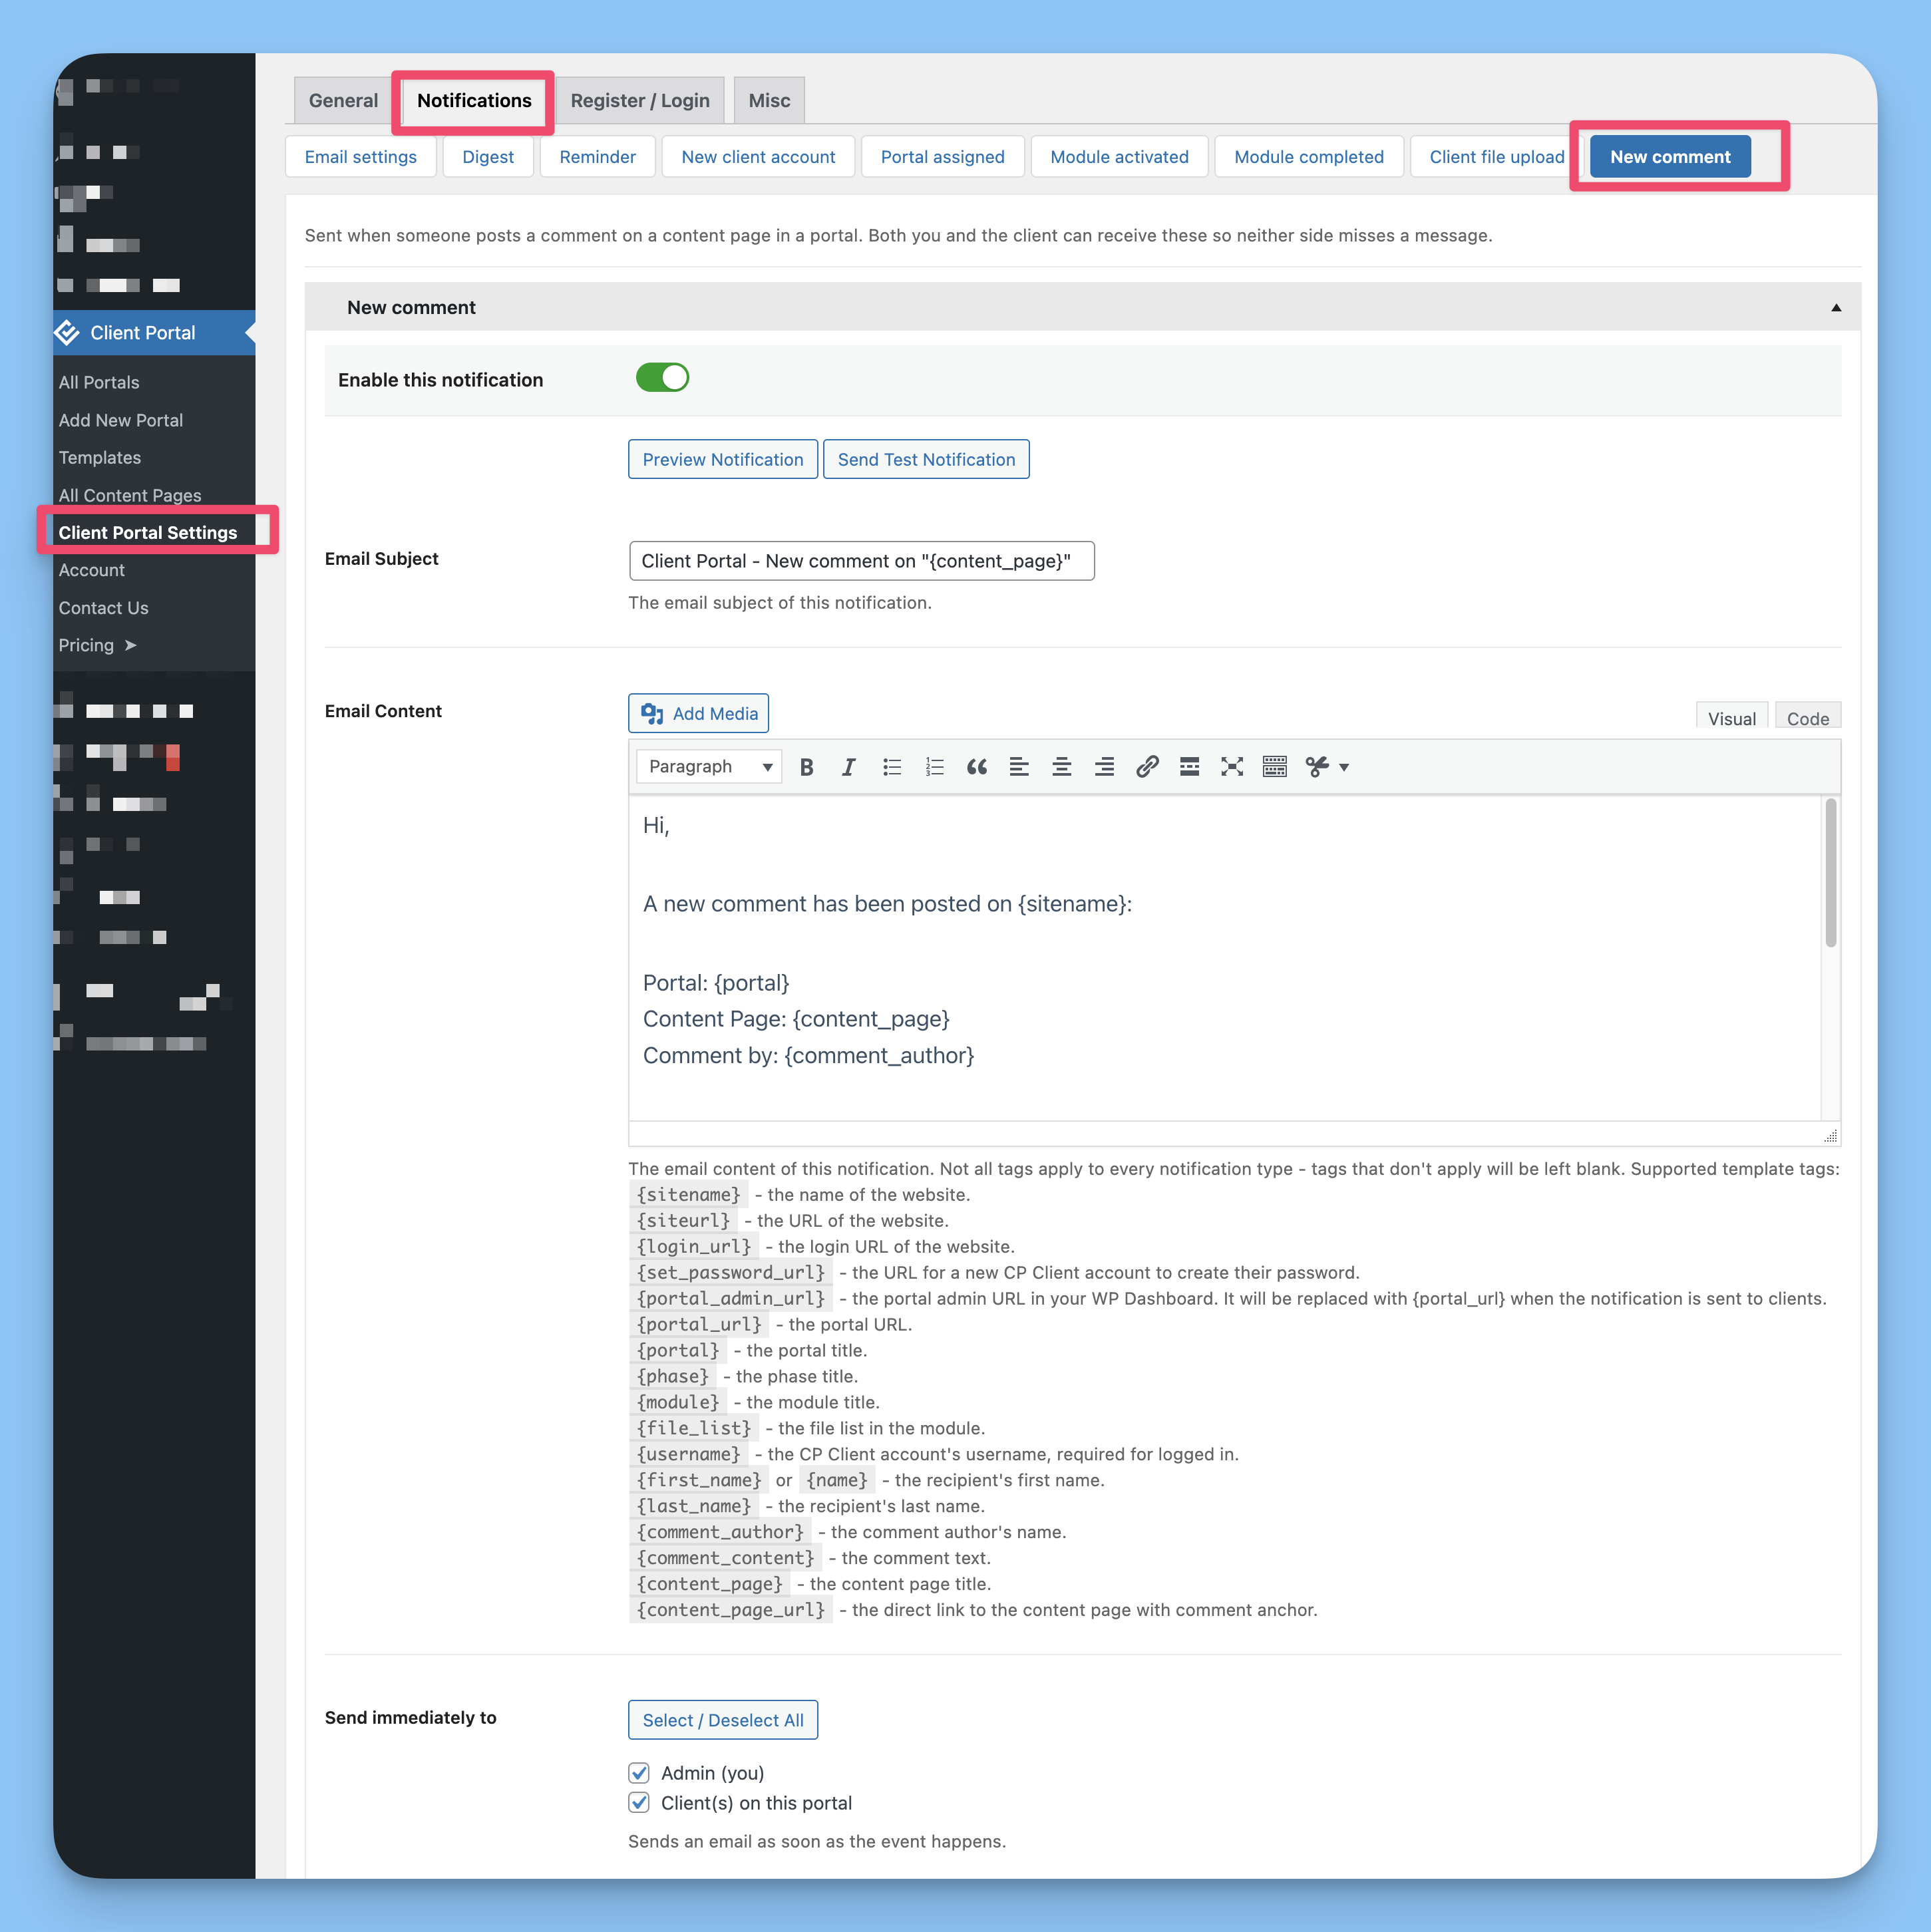
Client Portal includes built-in notifications for new comments. When a client or admin adds a comment on a Content Page, an email notification is sent automatically.
To enable or configure comment notifications:
Go to Client Portal Settings → Notifications
Click the New Comment tab
Toggle the notification on or off
Customize the email subject and content if needed
Choose who should receive the notification (client, admin, or both)
Save your changes
For more details on customizing notifications — including template tags, individual-portal overrides, and testing — see Notification settings.
Attach the Content Page to a portal
Comments only work when clients view the Content Page through a specific portal. To set this up:
Go to Client Portal → CP Portals and edit the portal where you want the Content Page
In the Modules section, click "Add Module" and choose "Content Page"
Select your Content Page from the dropdown
Save or update the portal
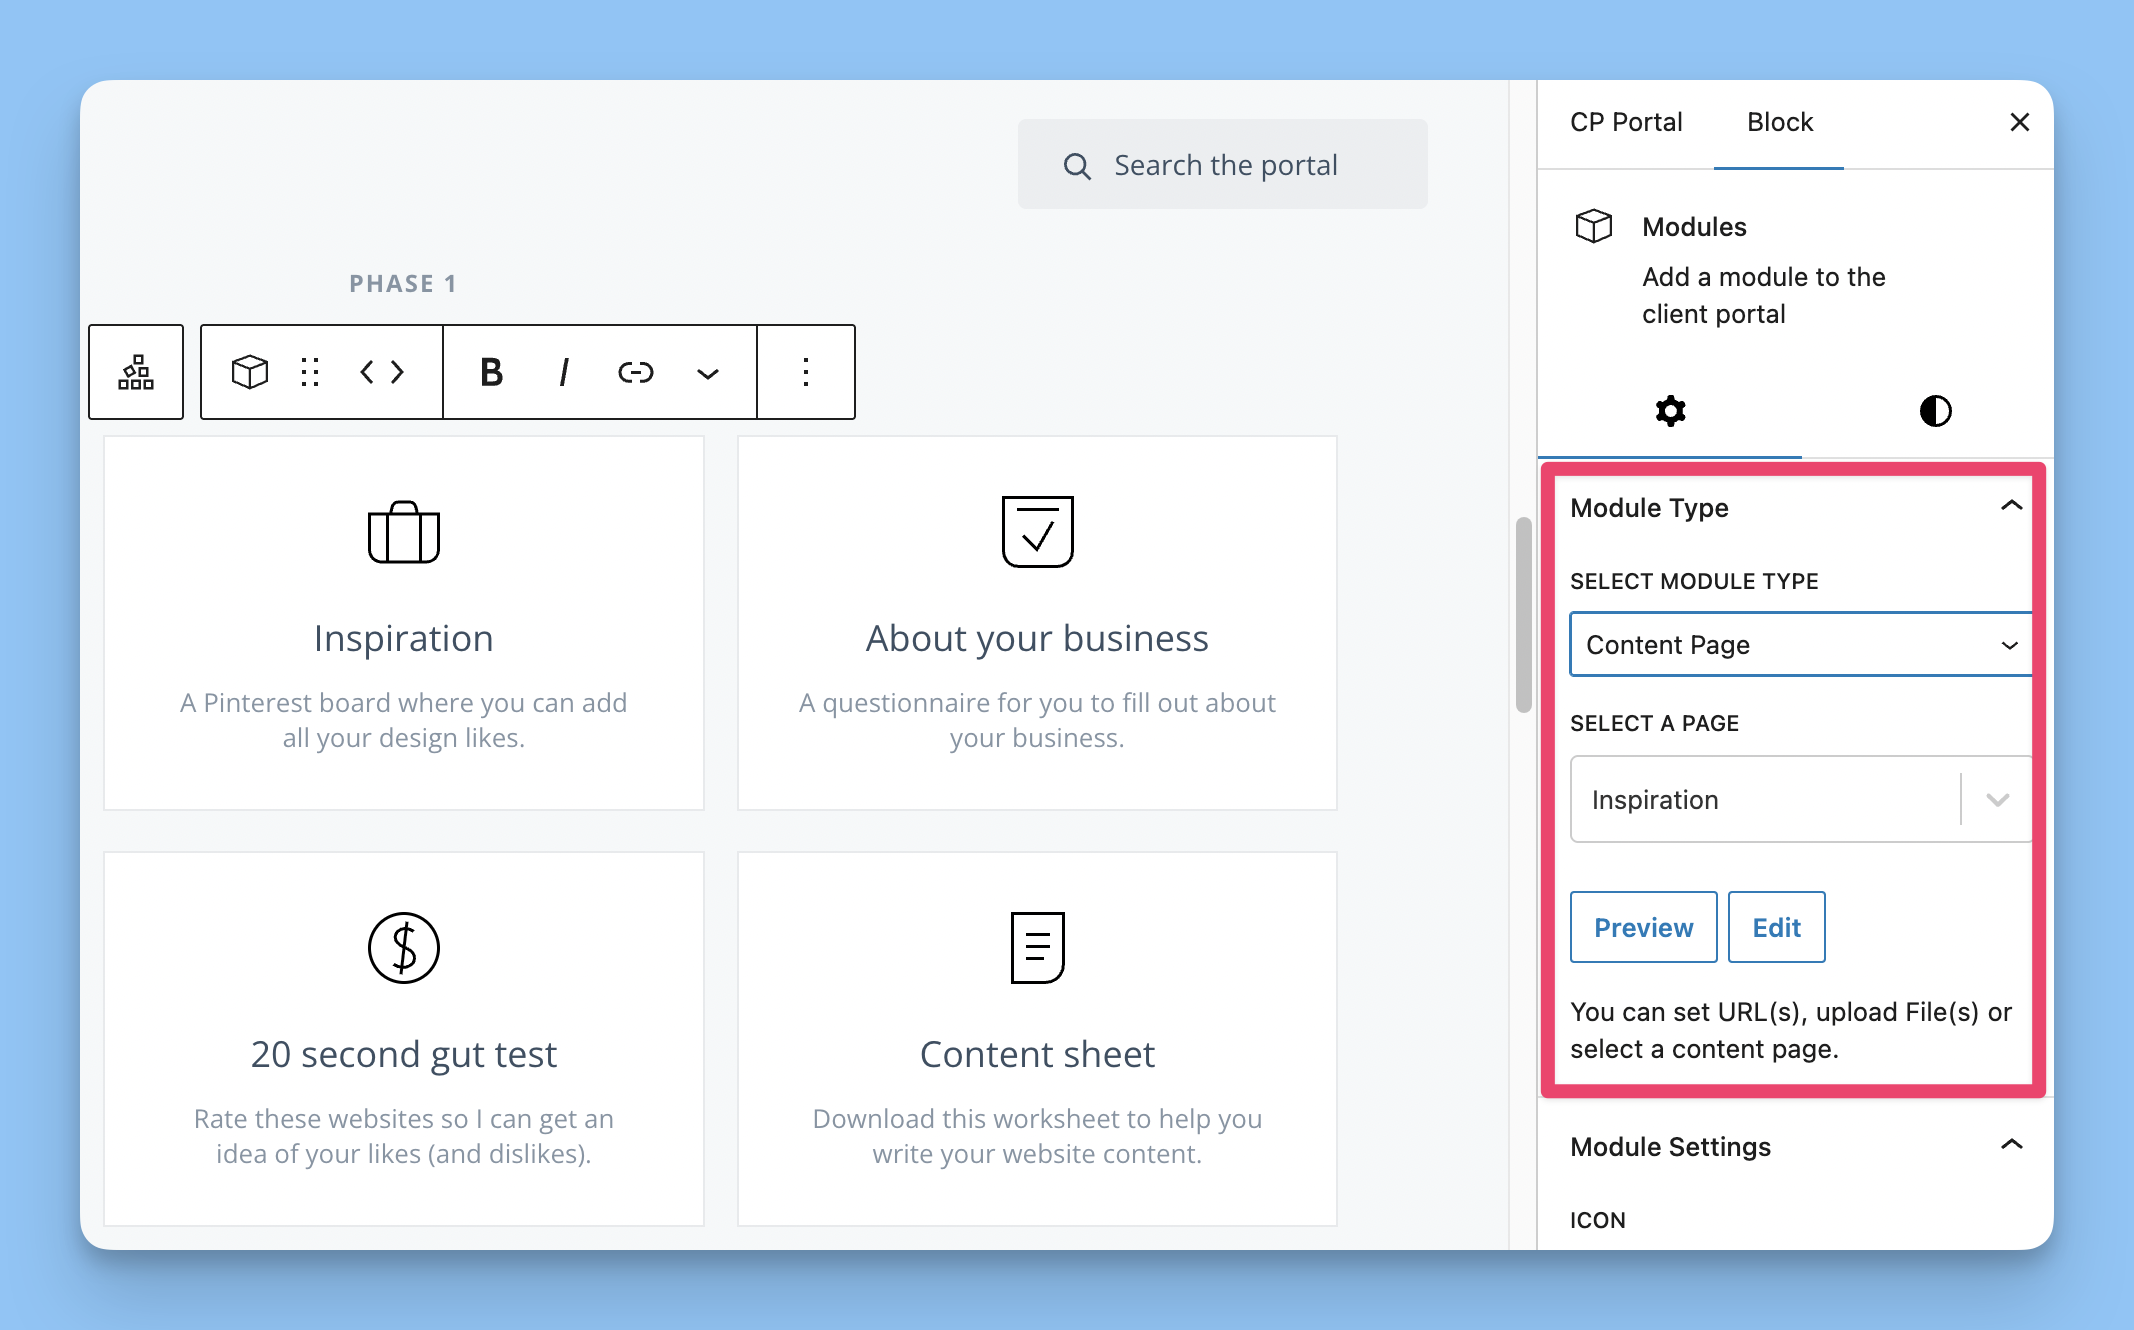
Now when clients visit that portal and click the Content Page module, they'll see the comment form below the content.
Once a Content Page has comments enabled and is attached to a portal, it won't appear in the dropdown when adding modules to other portals. This prevents comment mixing between different client projects.
Understanding the one-portal restriction
Content Pages with comments can only be linked to one portal. Here's how this works:
If a Content Page is already attached to multiple portals, the comments template won't display, even if comments are enabled
Once comments are enabled and the page is attached to a portal, it's automatically excluded from the Content Page dropdown in other portals
All clients with access to that specific portal can comment on the Content Page
This restriction ensures client conversations stay private and relevant. Comments from one project won't accidentally appear in another client's portal.
What clients see
When clients visit the Content Page through their portal, they'll find:
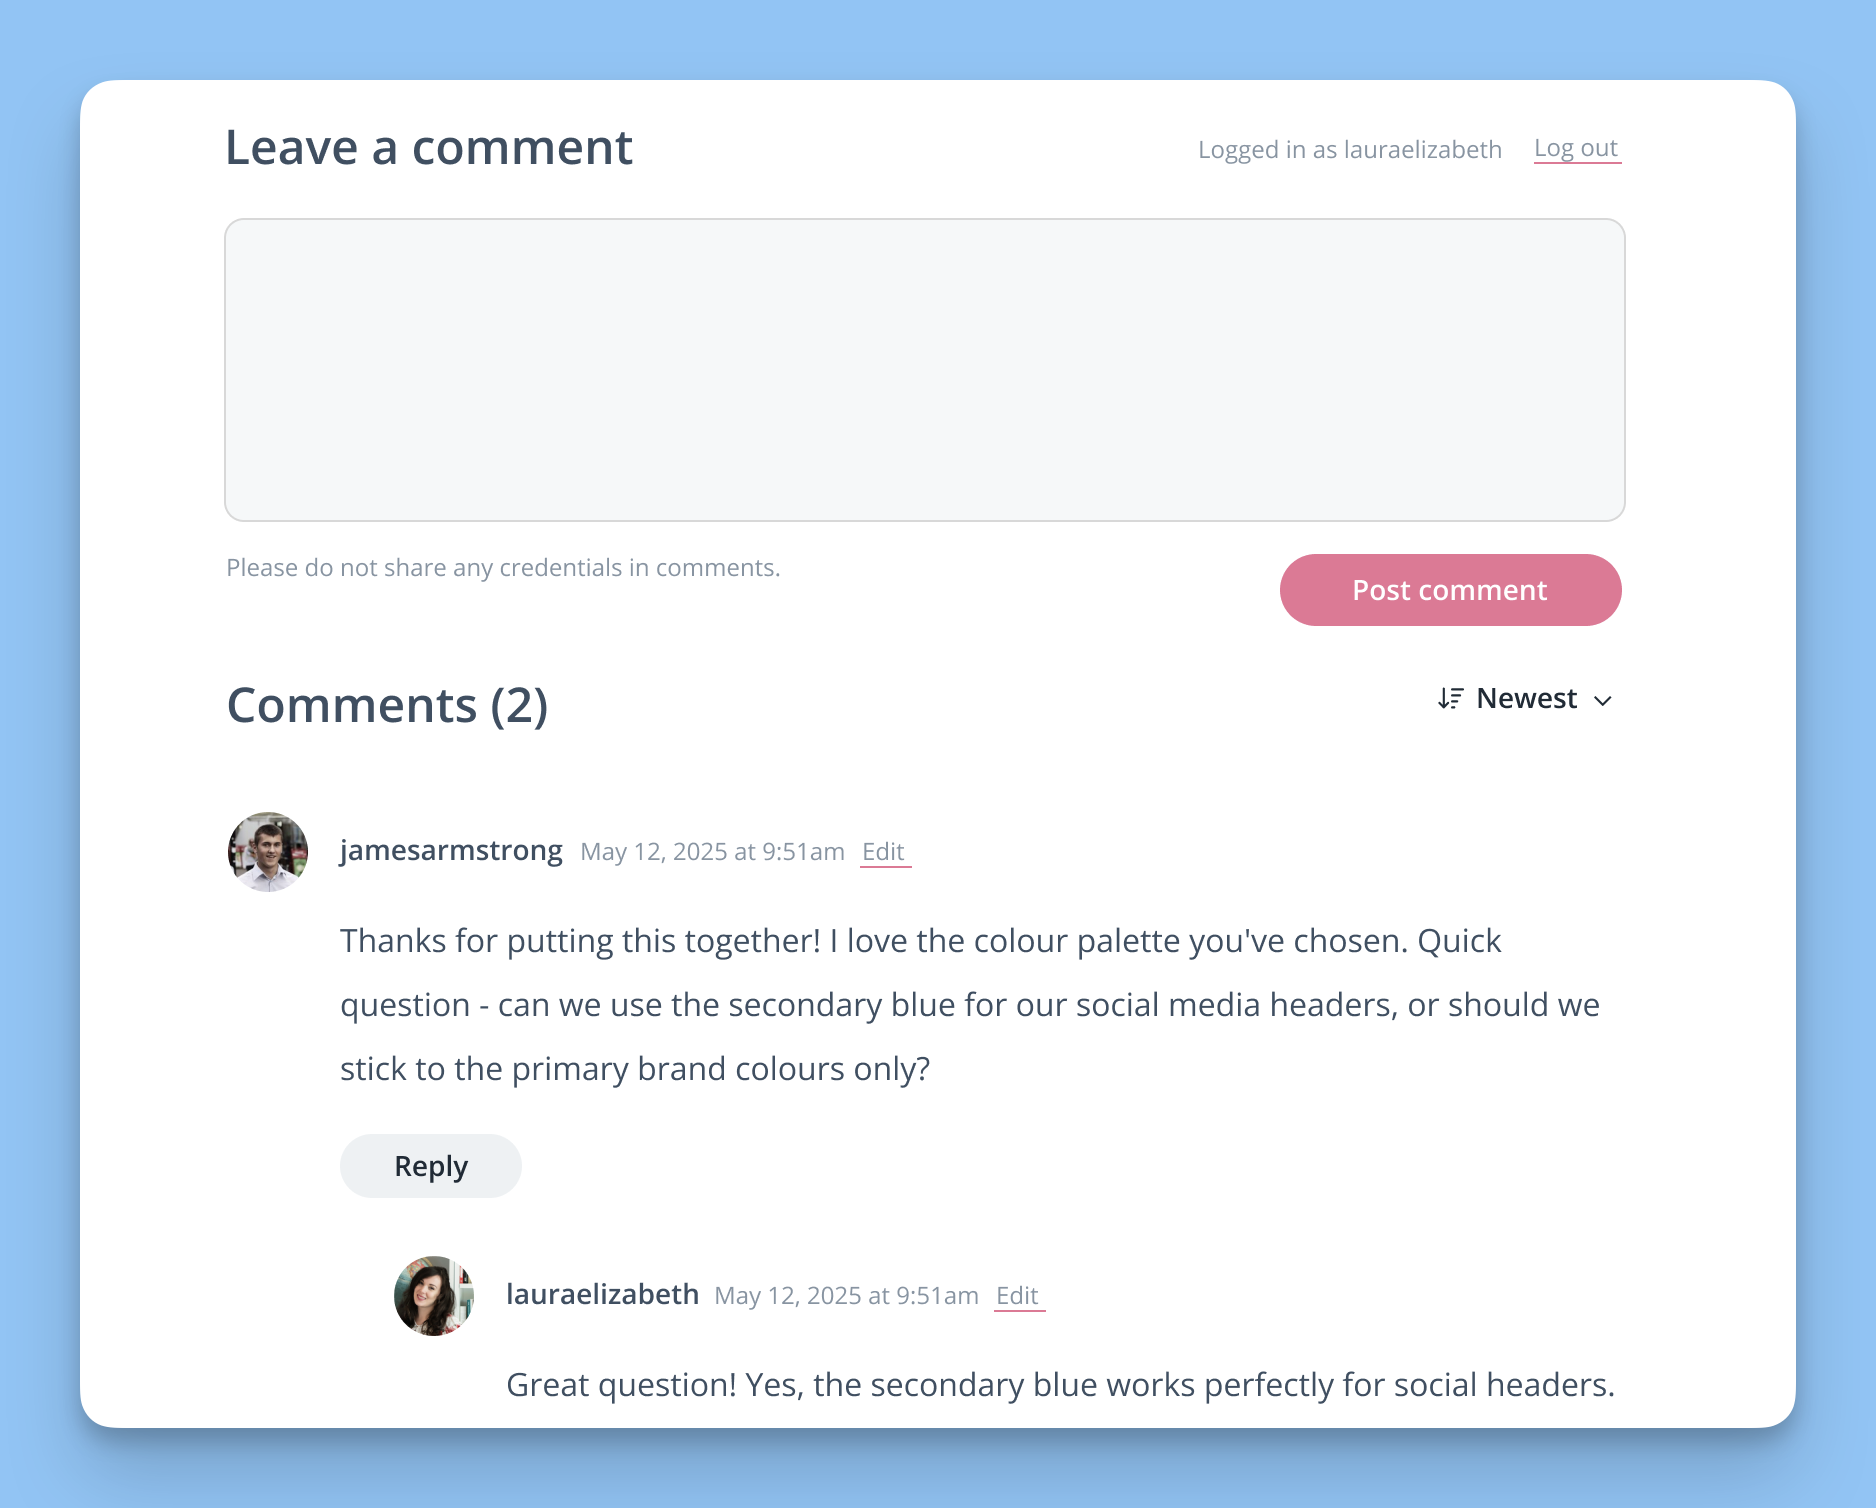
A "Leave a comment" form at the top of the comments section
Their display name and a log out option in the form header
All approved comments listed below the form
A dropdown to sort comments by "Newest" or "Oldest"
After submitting a comment, the page reloads and automatically scrolls to the new comment, which is highlighted. If the comment requires moderation, clients see a notice letting them know it's awaiting approval.
Preview comments as an admin
When editing a Content Page with comments enabled, you'll see an info notice showing which portal it's linked to:
Preview this content page in Project [Portal Name]
Click the preview link to see exactly what clients see, including the content, modules, and comments in the context of that specific portal.
Privacy and access control
Comments are automatically kept private and secure:
Comments are tied to the portal where clients are viewing the Content Page
Private portals prevent comments from being visible across multiple portals
Comments on Content Pages don't appear in public WordPress comment feeds or Recent Comments widgets
Only logged-in clients with access to the specific portal can view and post comments
Ready to try it out? Enable comments on a Content Page and see how your clients respond to having a direct way to give feedback on your content.