
Using Client Portal with WooCommerce
What the WooCommerce Integration Does
The Client Portal WooCommerce integration allows you to sell portal access directly from your website. When customers purchase a WooCommerce product, they automatically get added to a portal—either a brand new one created just for them, or an existing shared portal.
This automation eliminates manual portal setup after each sale and works for one-time products, subscriptions, and memberships.
This feature requires WooCommerce 3.0 or higher and Client Portal version 4.14+.
Before You Start
You'll need the following set up before configuring the integration:
WooCommerce installed and active on your WordPress site
At least one portal template (for creating new portals per customer) or one existing portal (for adding customers to a shared space)
Customer registration enabled in WooCommerce—this is critical because customers need a WordPress account to access their portal
Step 1: Configure WooCommerce Account Settings
Navigate to WooCommerce → Settings and click the Accounts & Privacy tab.
Make sure these settings are configured correctly:
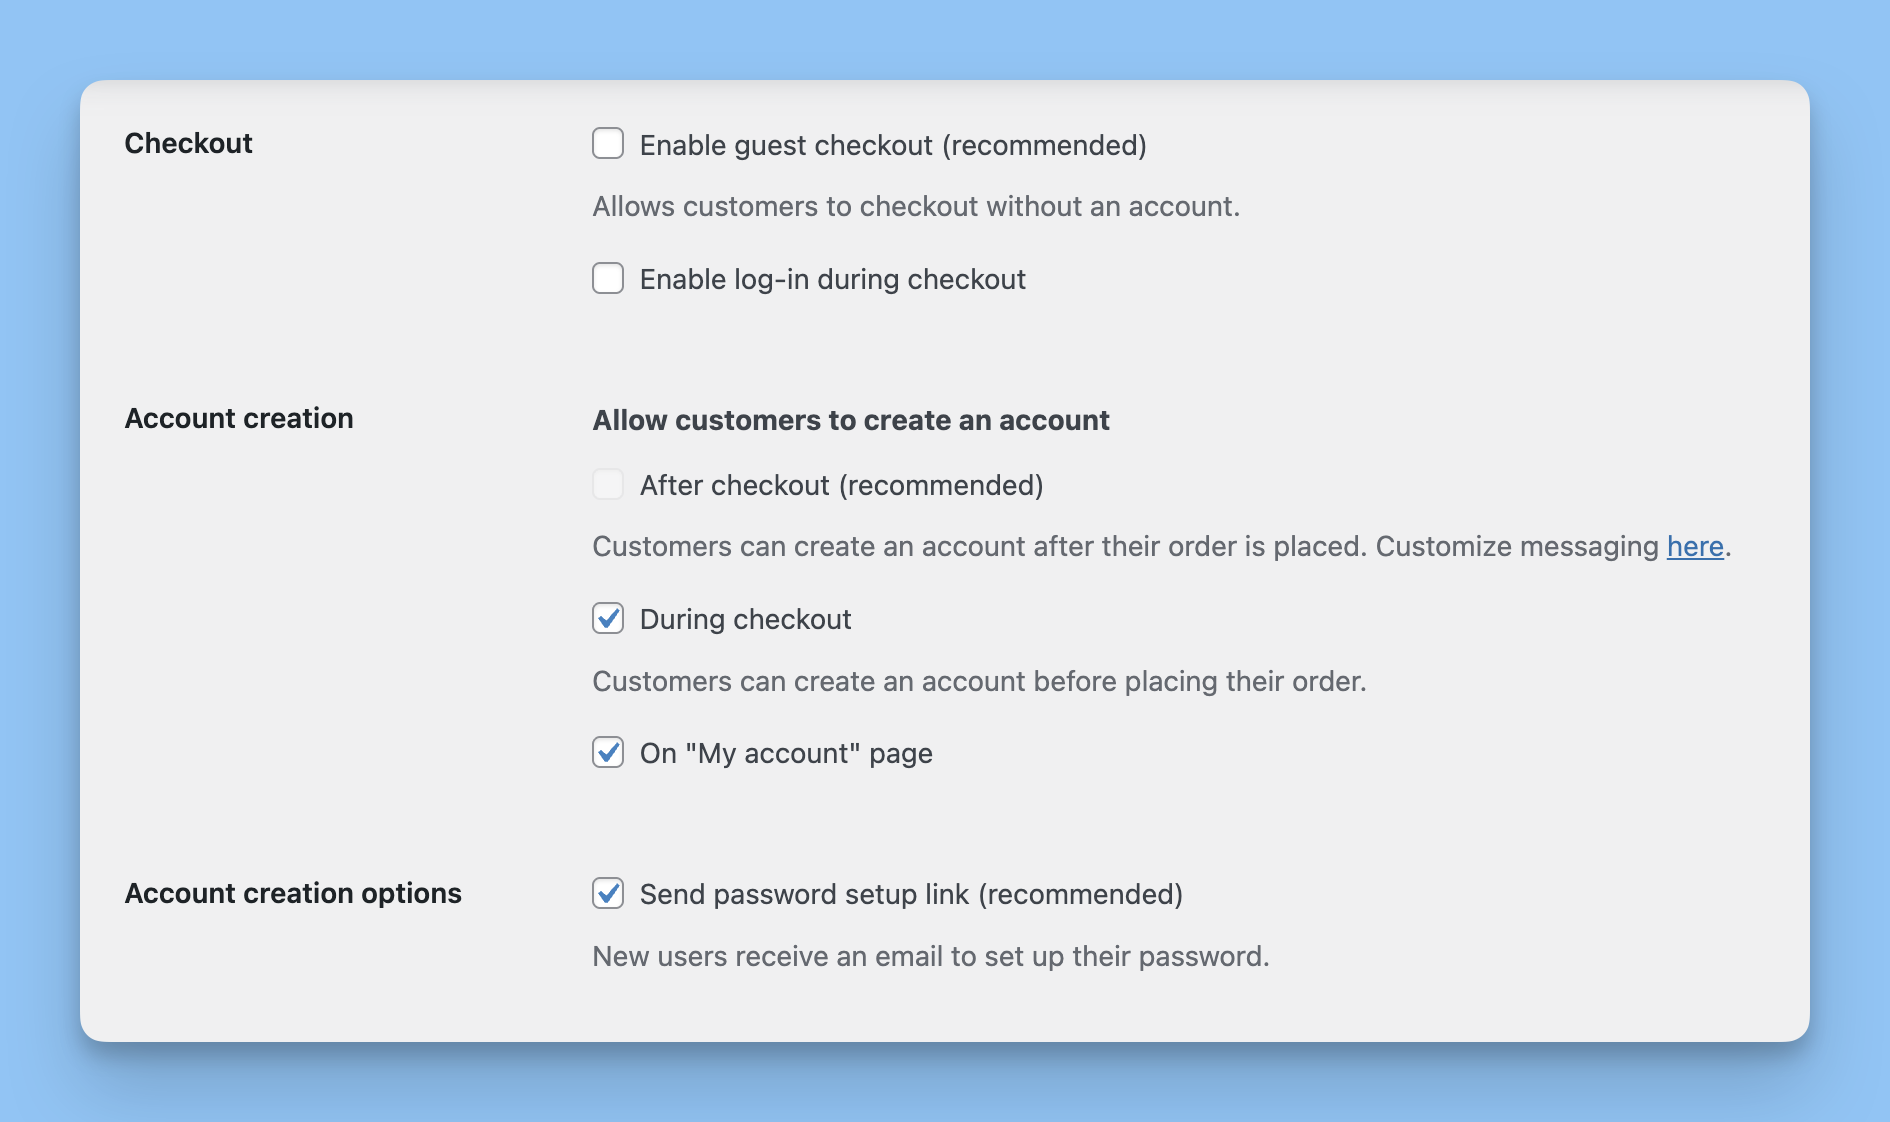
Checkout:
Uncheck "Enable guest checkout"—customers must have an account to receive portal access
Account Creation:
Check "Allow customers to create an account" and select either:
After checkout (recommended)—customers create an account after placing their order
During checkout—customers create an account before placing their order
Check "On 'My account' page" (optional but recommended)
Account Creation Options:
Check "Send password setup link" (recommended)—new users receive an email to set up their password
If guest checkout is enabled or account creation is disabled, customers won't receive portal access after purchase. Client Portal will display a warning in the product editor if these settings are incorrect.
Step 2: Link a Product to a Portal
Go to Products → Add New (or edit an existing product). You'll see a new tab in the Product Data metabox called "Linked Client Portal".
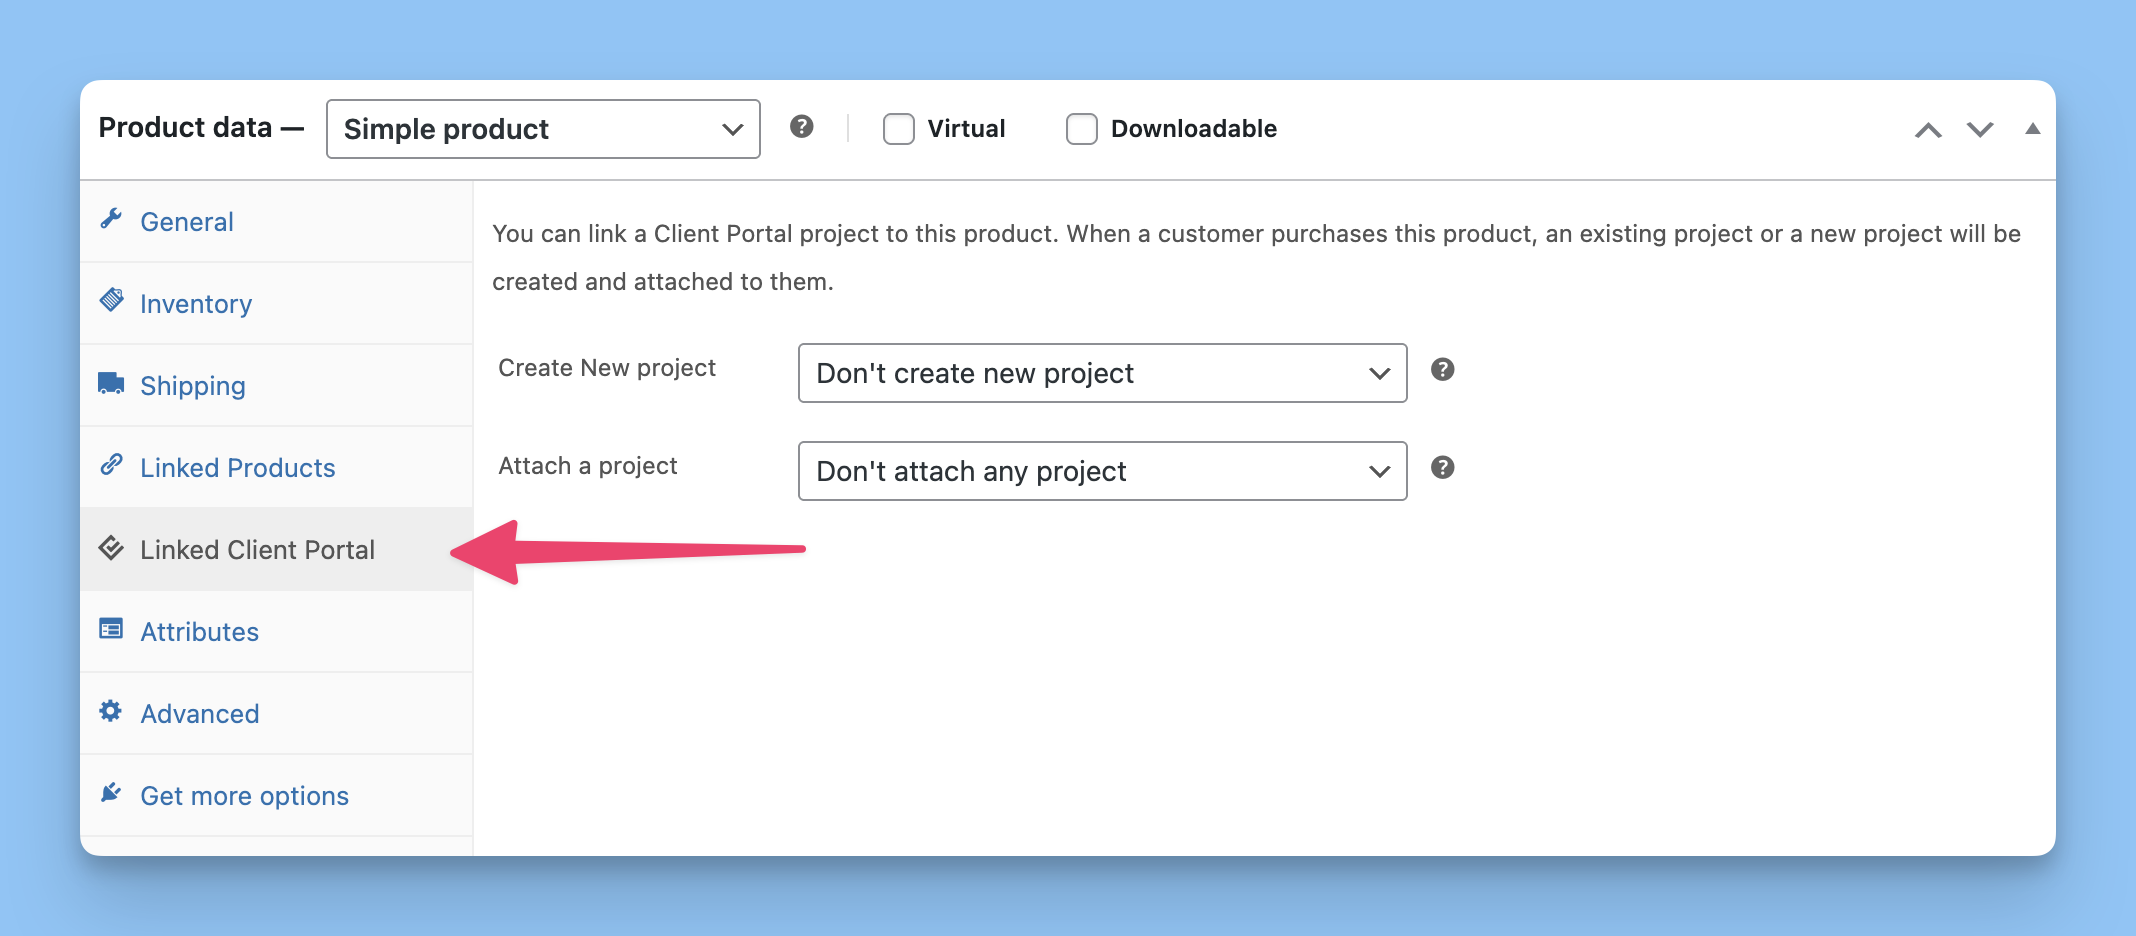
Choose Your Access Type
You have two options for how customers get portal access:
Option 1: Create New Project
This creates a brand new portal for each customer based on a template you've set up. Each customer gets their own private portal—ideal for one-on-one services like coaching, consulting, or client work.
To set this up:
Select "Create new project"
Choose a template from the dropdown (create templates at Client Portal → All CP Project Templates)
Set a project title—you can use placeholders like
{first_name}or{last_name}to personalize the title (e.g., "Welcome {first_name}!")Optionally check "Skip Project Creation" if the customer already has an active project (prevents duplicates on repeat purchases)
Use portal templates to pre-populate new portals with welcome messages, intake forms, resource libraries, or booking links. This saves you from setting up each portal manually.
Option 2: Attach to Existing Project
This adds customers to a portal you've already created. All customers who purchase this product will see the same portal—perfect for memberships, online courses, or resource centers where everyone shares the same content.
To set this up:
Select "Attach a project"
Choose an existing portal from the dropdown (view portals at Client Portal → All CP Projects)
Update the product
When you update content in a shared portal, all attached customers see the changes immediately—no need to update individual portals.
What Happens After Purchase
When a customer completes their purchase:
They're automatically registered as a WordPress user (if they don't already have an account)
They're assigned the "CP Client" role in Client Portal
If you selected "Create new project," a new portal is generated from your template with their personalized title
If you selected "Attach to project," they're added to the existing portal
They can log in and access their portal immediately
What Happens with Refunds and Cancellations
Client Portal automatically manages access based on order status:
Order refunded: Customer is removed from the portal
Order cancelled: Customer is removed from the portal
Subscription cancelled: Customer loses access when the subscription is no longer active
For subscriptions, access is checked each time the customer tries to view the portal. If the subscription is inactive, they won't be able to access it.
Ideas for What to Sell
Here are some ways businesses use the WooCommerce integration:
Services: Web design, accounting, consulting, or legal services where clients pay a deposit and get immediate access to their project portal
Productized services: Fixed-scope packages like SEO audits, brand identity kits, or blog article writing
Monthly retainers: Website care plans, ongoing coaching, or maintenance subscriptions
Online courses: Deliver course content through portal pages with embedded videos, text lessons, and downloadable resources
Resource centers: Paid access to guides, templates, or tool collections
Digital downloads: Provide a clean interface for managing downloads with support documentation and updates
Common Issues and Troubleshooting
Warning: "Please adjust your Guest Checkout settings"
This appears when WooCommerce is configured to allow guest checkout or doesn't require account registration. Go to WooCommerce → Settings → Accounts & Privacy and follow the settings in Step 1 above.
Error: "You need to set up a project title"
If you've selected "Create new project" and chosen a template, you must also provide a project title. This can be a static title or include dynamic placeholders like {first_name}.
Customers are getting duplicate portals on repeat purchases
Enable the "Skip Project Creation" checkbox in the Linked Client Portal settings. This prevents creating new portals if the customer already has an active project from a previous purchase.
Customer says they can't access their portal after purchase
Check the following:
Verify the order status is "Completed" or "Processing" (not "Pending" or "On Hold")
Confirm the customer has a WordPress account—they should have received login credentials via email
If it's a subscription, ensure the subscription status is "Active"
Check that the correct portal or template was selected in the product settings