
How to customize your portals with custom CSS
What you'll learn
Client Portal doesn't have built-in options for every visual customization, but you can use Custom CSS to style your portals beyond the standard color and font pickers. This guide shows you how to add custom CSS safely and target specific portals or modules.
Where to add custom CSS
You'll find two Custom CSS fields depending on which editor you're using:
Go to WP Admin → Clients → Client Portal Settings → General
Scroll down to find:
Custom CSS - Five Theme (if you're using the Block Editor)
Custom CSS - Legacy Theme (if you're using the Classic Editor)
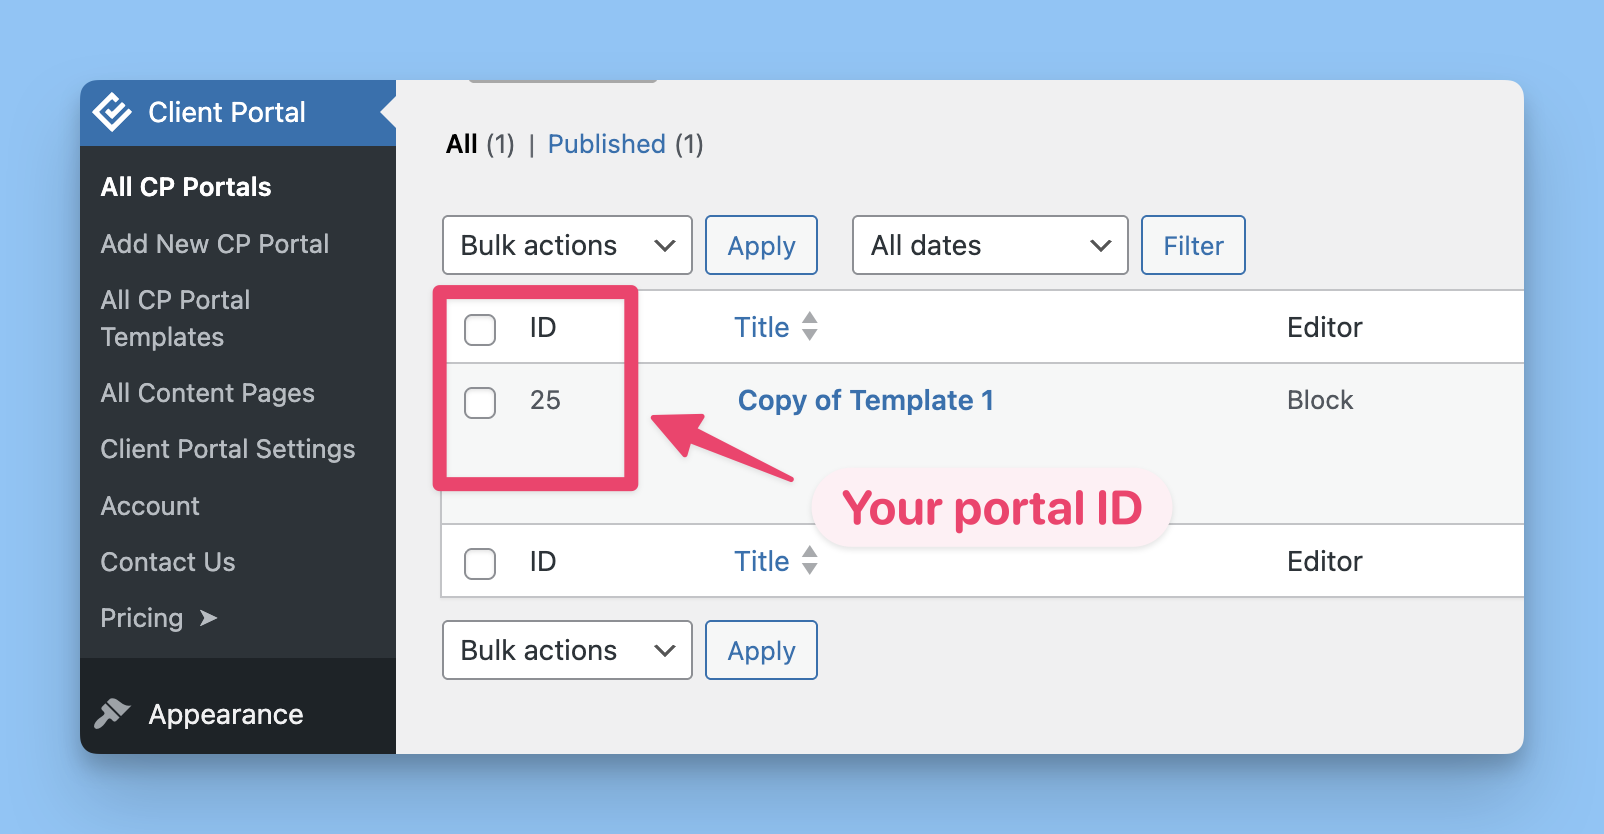
Not sure which editor you're using? Go to Posts → Client Portals and check the Editor column. It will show either "Block" (Five Theme) or "Legacy".
CSS added here applies to all portals by default. To target specific portals, you'll need to use portal IDs (explained below).
How to find your portal ID
Each portal has a unique ID that WordPress assigns. You'll use this to apply CSS to specific portals:
Go to WP Admin → Posts → Client Portals
Find the ID column in your portals list
Note the number (e.g.,
212)
Every portal page has a postid-{ID} class on the body tag that you can target with CSS.
How to target specific portals
Use the portal ID as a prefix to apply CSS only to that portal:
/* This CSS only affects portal 212 */
.postid-212 h2 {
    color: red;
}

/* This affects ALL portals */
h2 {
    color: blue;
}
Common customization: Module background colors
One of the most requested customizations is changing module background colors to visually differentiate content. Since there's no built-in feature for this yet, you can use CSS to target individual modules.
Find your module IDs
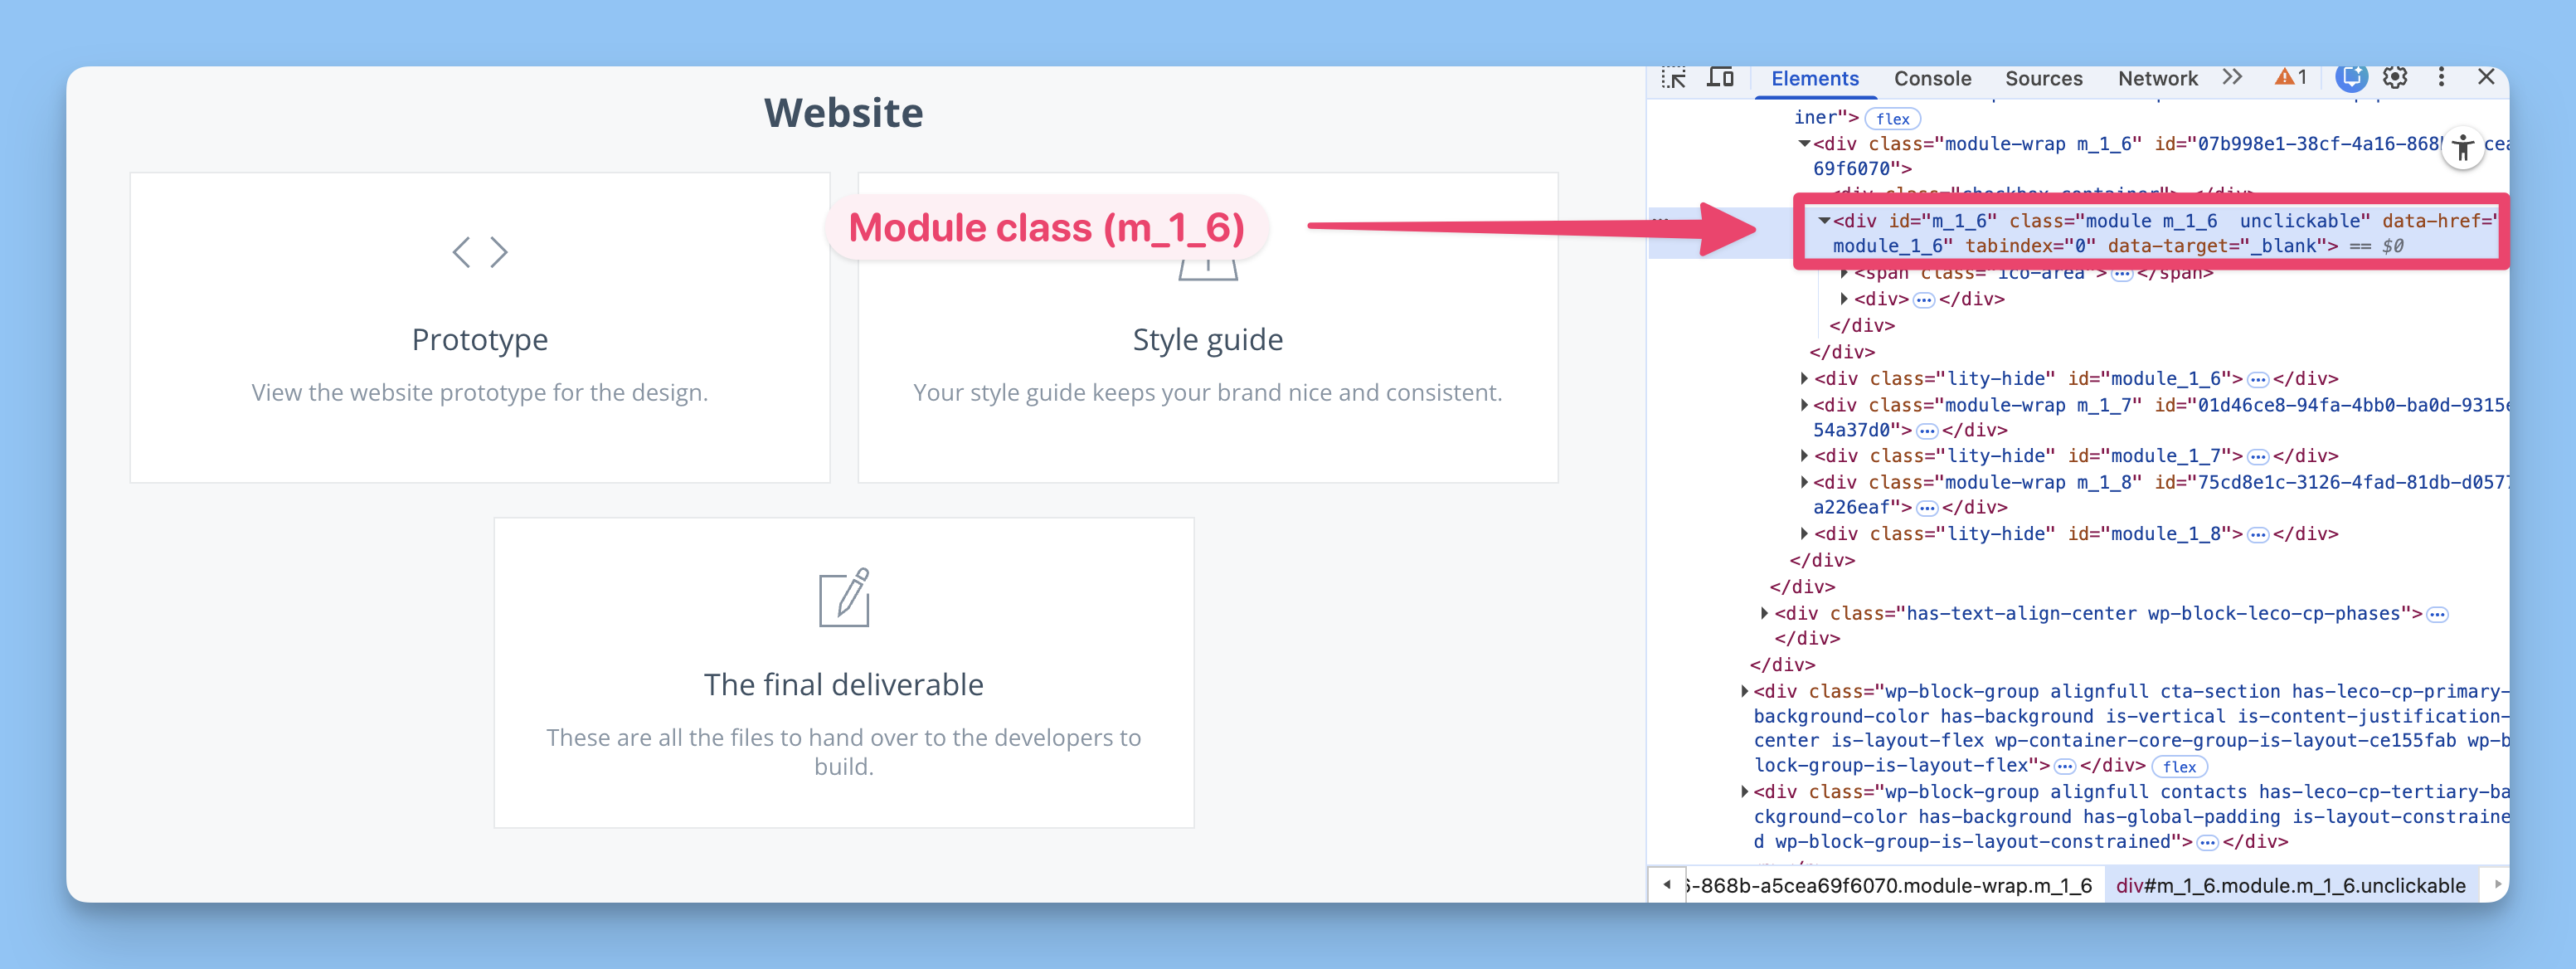
Each module has a unique class in the format m_{phase}_{module}, where both numbers start from 0:
m_0_1= Phase 1, Module 2m_1_0= Phase 2, Module 1m_2_3= Phase 3, Module 4
To find the exact IDs for your modules:
View your portal on the frontend
Right-click on a module and select Inspect
Look for
class="module m_0_1"or similar in the HTML
Example: Color-code modules by purpose
Let's say you want blue backgrounds for some modules and green backgrounds for other modules:
/* Modules with blue background */
.module.m_0_1,
.module.m_0_3,
.module.m_1_0 {
    background-color: #e8f4fc;
    border-color: #3498db;
}

/* Modules with green background */
.module.m_0_2,
.module.m_0_4,
.module.m_1_1 {
    background-color: #eafaf1;
    border-color: #27ae60;
}
Example: Different colors across multiple portals
If you manage multiple portals with different color schemes, combine portal IDs with module classes:
/* Portal 212 - blue modules */
.postid-212 .module.m_0_1,
.postid-212 .module.m_0_3 {
    background-color: #e8f4fc;
    border-color: #3498db;
}

/* Portal 215 - purple modules */
.postid-215 .module.m_0_1,
.postid-215 .module.m_0_3 {
    background-color: #f3e8fc;
    border-color: #9b59b6;
}
Module IDs are unique to each portal. If you copy a portal, the module IDs will be different, so you'll need to inspect and update your CSS.
Common customization: Fonts
For detailed examples on customizing fonts (including module titles, descriptions, and headings), see our dedicated guide: How to change fonts in Client Portal.
Troubleshooting custom CSS
CSS not applying
Check the correct field: Make sure you're using the Five Theme field if you're on the Block Editor, or Legacy Theme if you're on Classic Editor
Use
!important: If your styles aren't overriding defaults, add!importantto your declaration:.module { background-color: #ffeb3b !important; }Clear cache: If you're using a caching plugin, clear it after adding CSS
Inspect the element: Right-click → Inspect to confirm your CSS is loading and check for conflicting styles
Additional CSS Classes field not working
If you've tried using the "Additional CSS Classes" field in the module block editor, you may have noticed it doesn't output to the frontend. This is a known limitation that will be addressed in a future update.
Instead of relying on custom classes, use the unique module IDs (m_0_1, etc.) that are automatically generated for each module.
Best practices
Test on one portal first: Use portal IDs to test changes before applying globally
Document your module IDs: Keep a note of which module IDs correspond to which content, especially if you have many modules
Use browser tools: Right-click → Inspect is your best friend for finding classes and testing CSS before adding it permanently
Keep it simple: Custom CSS can get complex quickly—focus on high-impact visual changes
Remember: Changes made in the Custom CSS fields apply immediately after saving. Always preview your portals after making changes to confirm everything looks as expected.