
Setting up your first portal
Use this guide to create your first portal, set the branding, organize your content, and get it ready for clients.
The video below is a walkthrough on how to set up your first portal. Since the video, we've added a few more features, so things might look slightly different. Bear with us while we get this updated.
What you'll learn
How to create a new portal and add a title
How to customize your logo and brand colors
How portal structure works with phases and modules
How to add and organize content blocks
How to preview and publish your portal
Before you start
Make sure you have:
WordPress 5.0 or higher installed
Client Portal activated
Admin access to your WordPress site
Your company logo and brand colors ready, if you want to use them
It helps to plan what your clients need to see before you build the portal. Check out our free workshop and Google Docs planning template for help structuring your portals.
Step 1: Set up your global branding
Before creating your first portal, set up your default branding in Client Portal > Settings. This saves time by applying your company logo and brand colors to every new portal.
These are default settings. You can override them for individual portals later.
Go to Client Portal > Settings.
Upload your company logo.
Set your primary and secondary brand colors.
Click Save Changes.
New portals will now use these defaults unless you customize them per portal.
Step 2: Create your first portal
In your WordPress dashboard, go to Client Portal and click Add New. That opens Create a New Portal.
To start a blank portal:
Under Start from Scratch, click Create Blank Portal.
Add a title, such as a client name or project name.
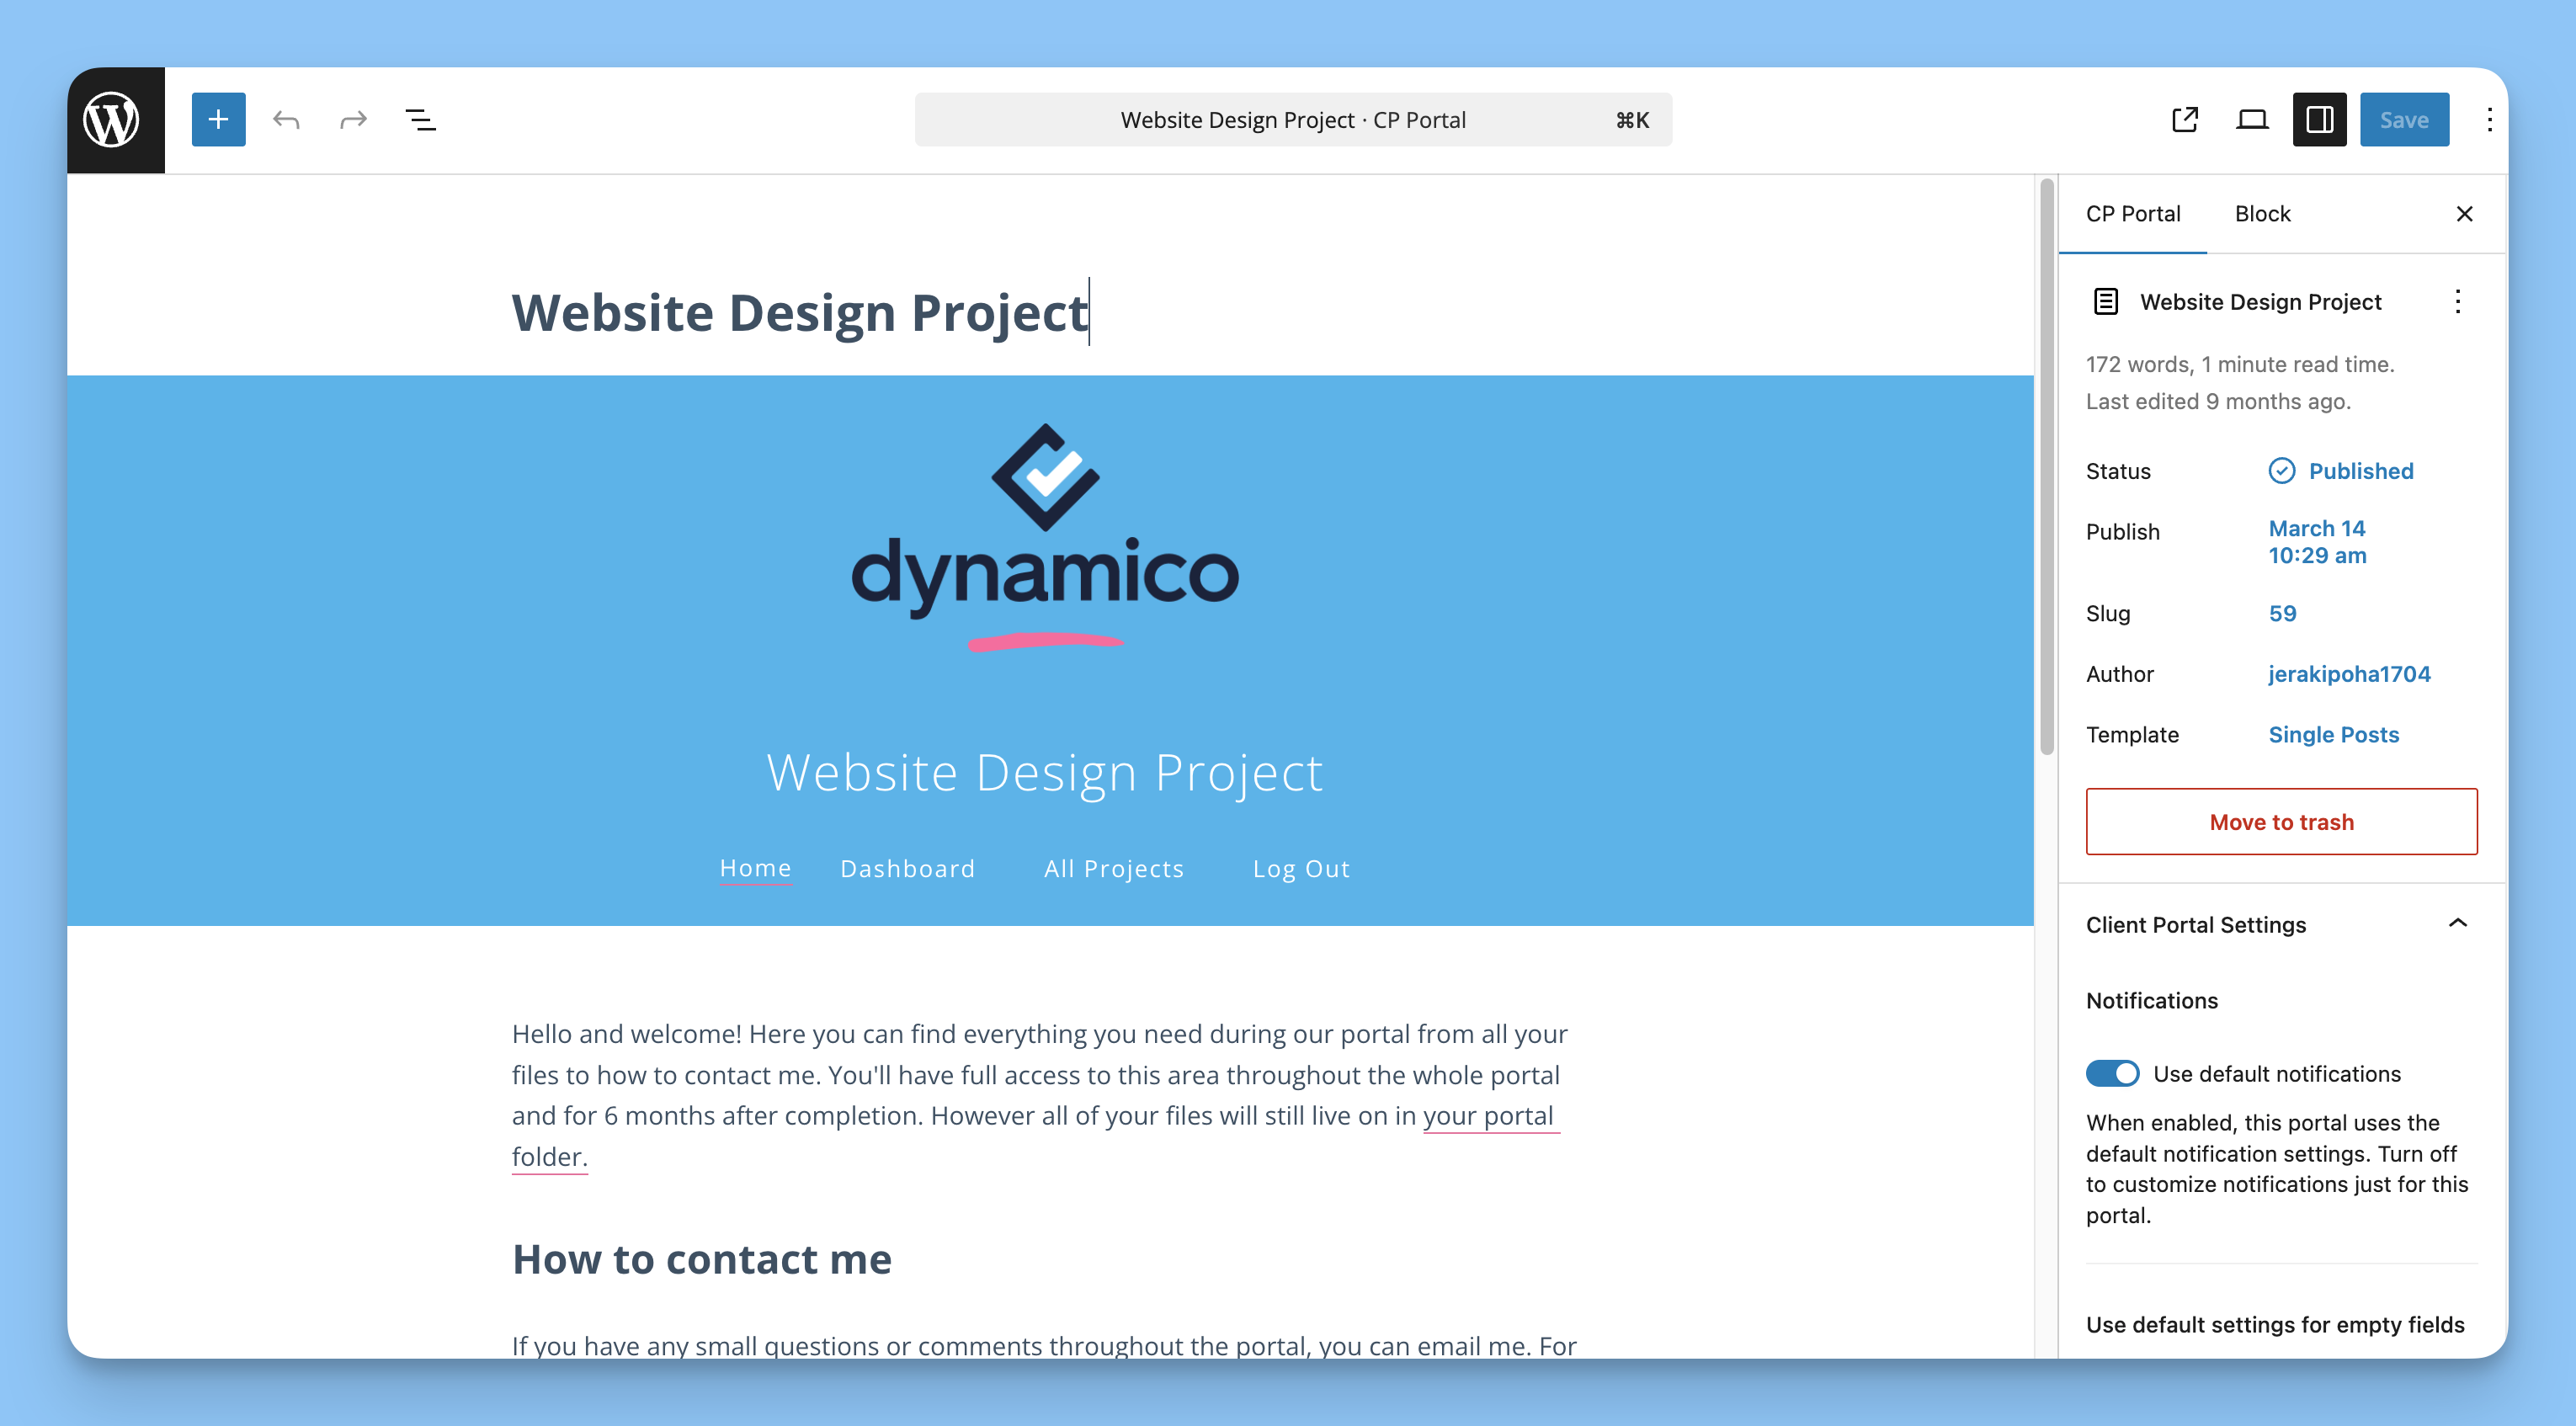
You can also start from My Templates (these are portals that you create and save as templates to reuse), or pick a ready-made layout in Portal Gallery.
Related: Creating portal templates covers your own templates.
The Quick Add button on the portals list skips this screen and opens a blank portal.
The portal uses the logo and brand colors you set in the previous step.
Step 3: Customize portal branding
You can override the global branding for individual portals to match a client's brand or create a different look.
Customize the logo for this portal
Click the logo in your portal.
Choose Replace.
Select your logo from the Media Library and click Select.
Adjust the size under the Block tab in the right sidebar.
If needed, turn on Fixed logo width and set a custom width.
Update brand colors
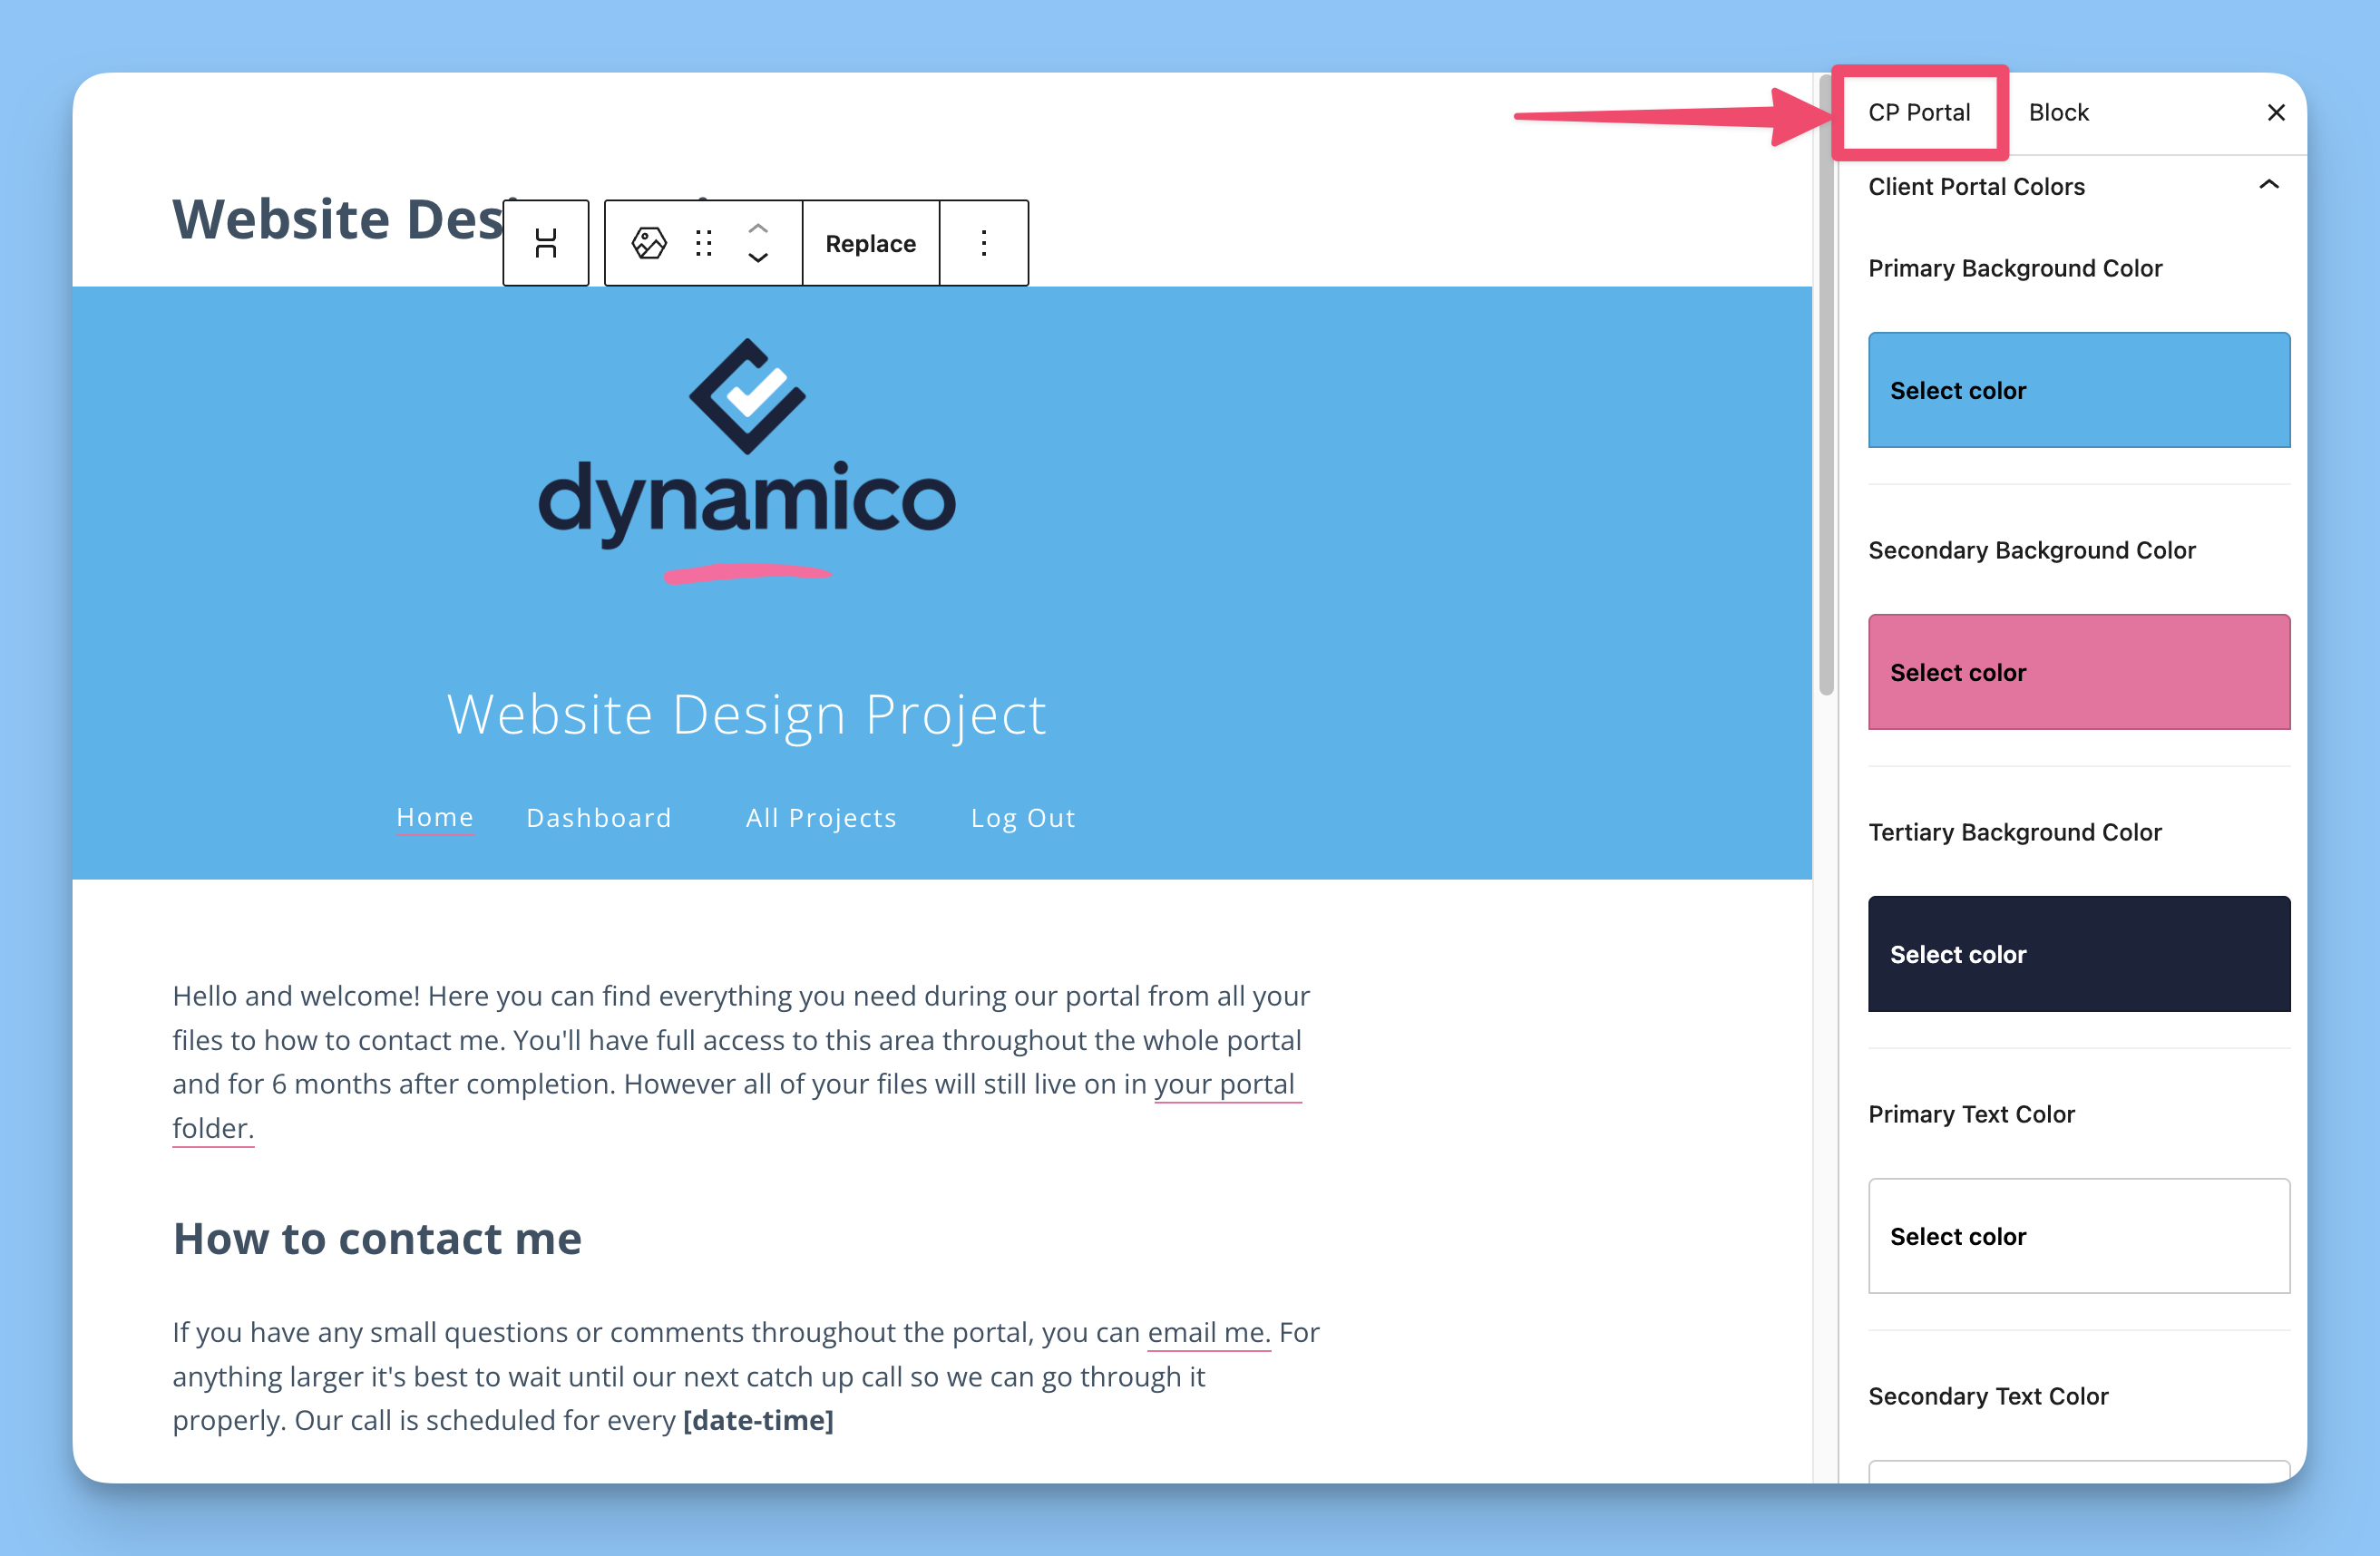
Click the CP Portal tab at the top to edit portal-specific brand colors.
Scroll down and click the colors you want to change.
Click Apply this color after choosing a color.
Click Save Draft and refresh the page.
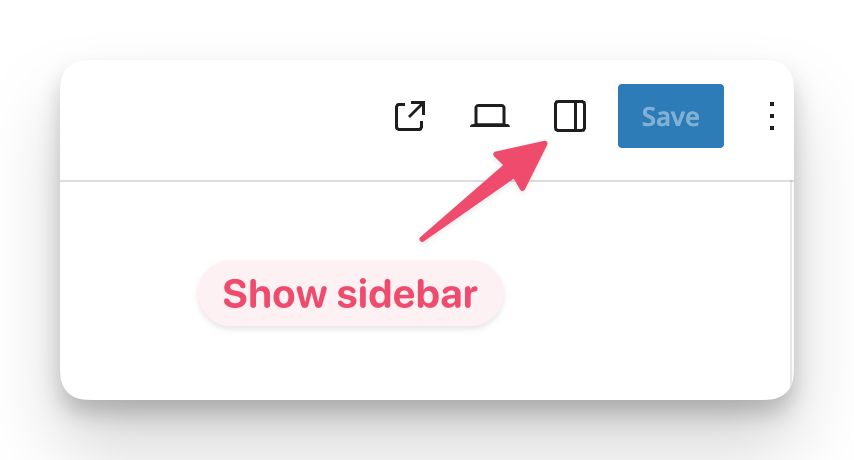
If the sidebar disappears, click the icon at the top right to show it again.
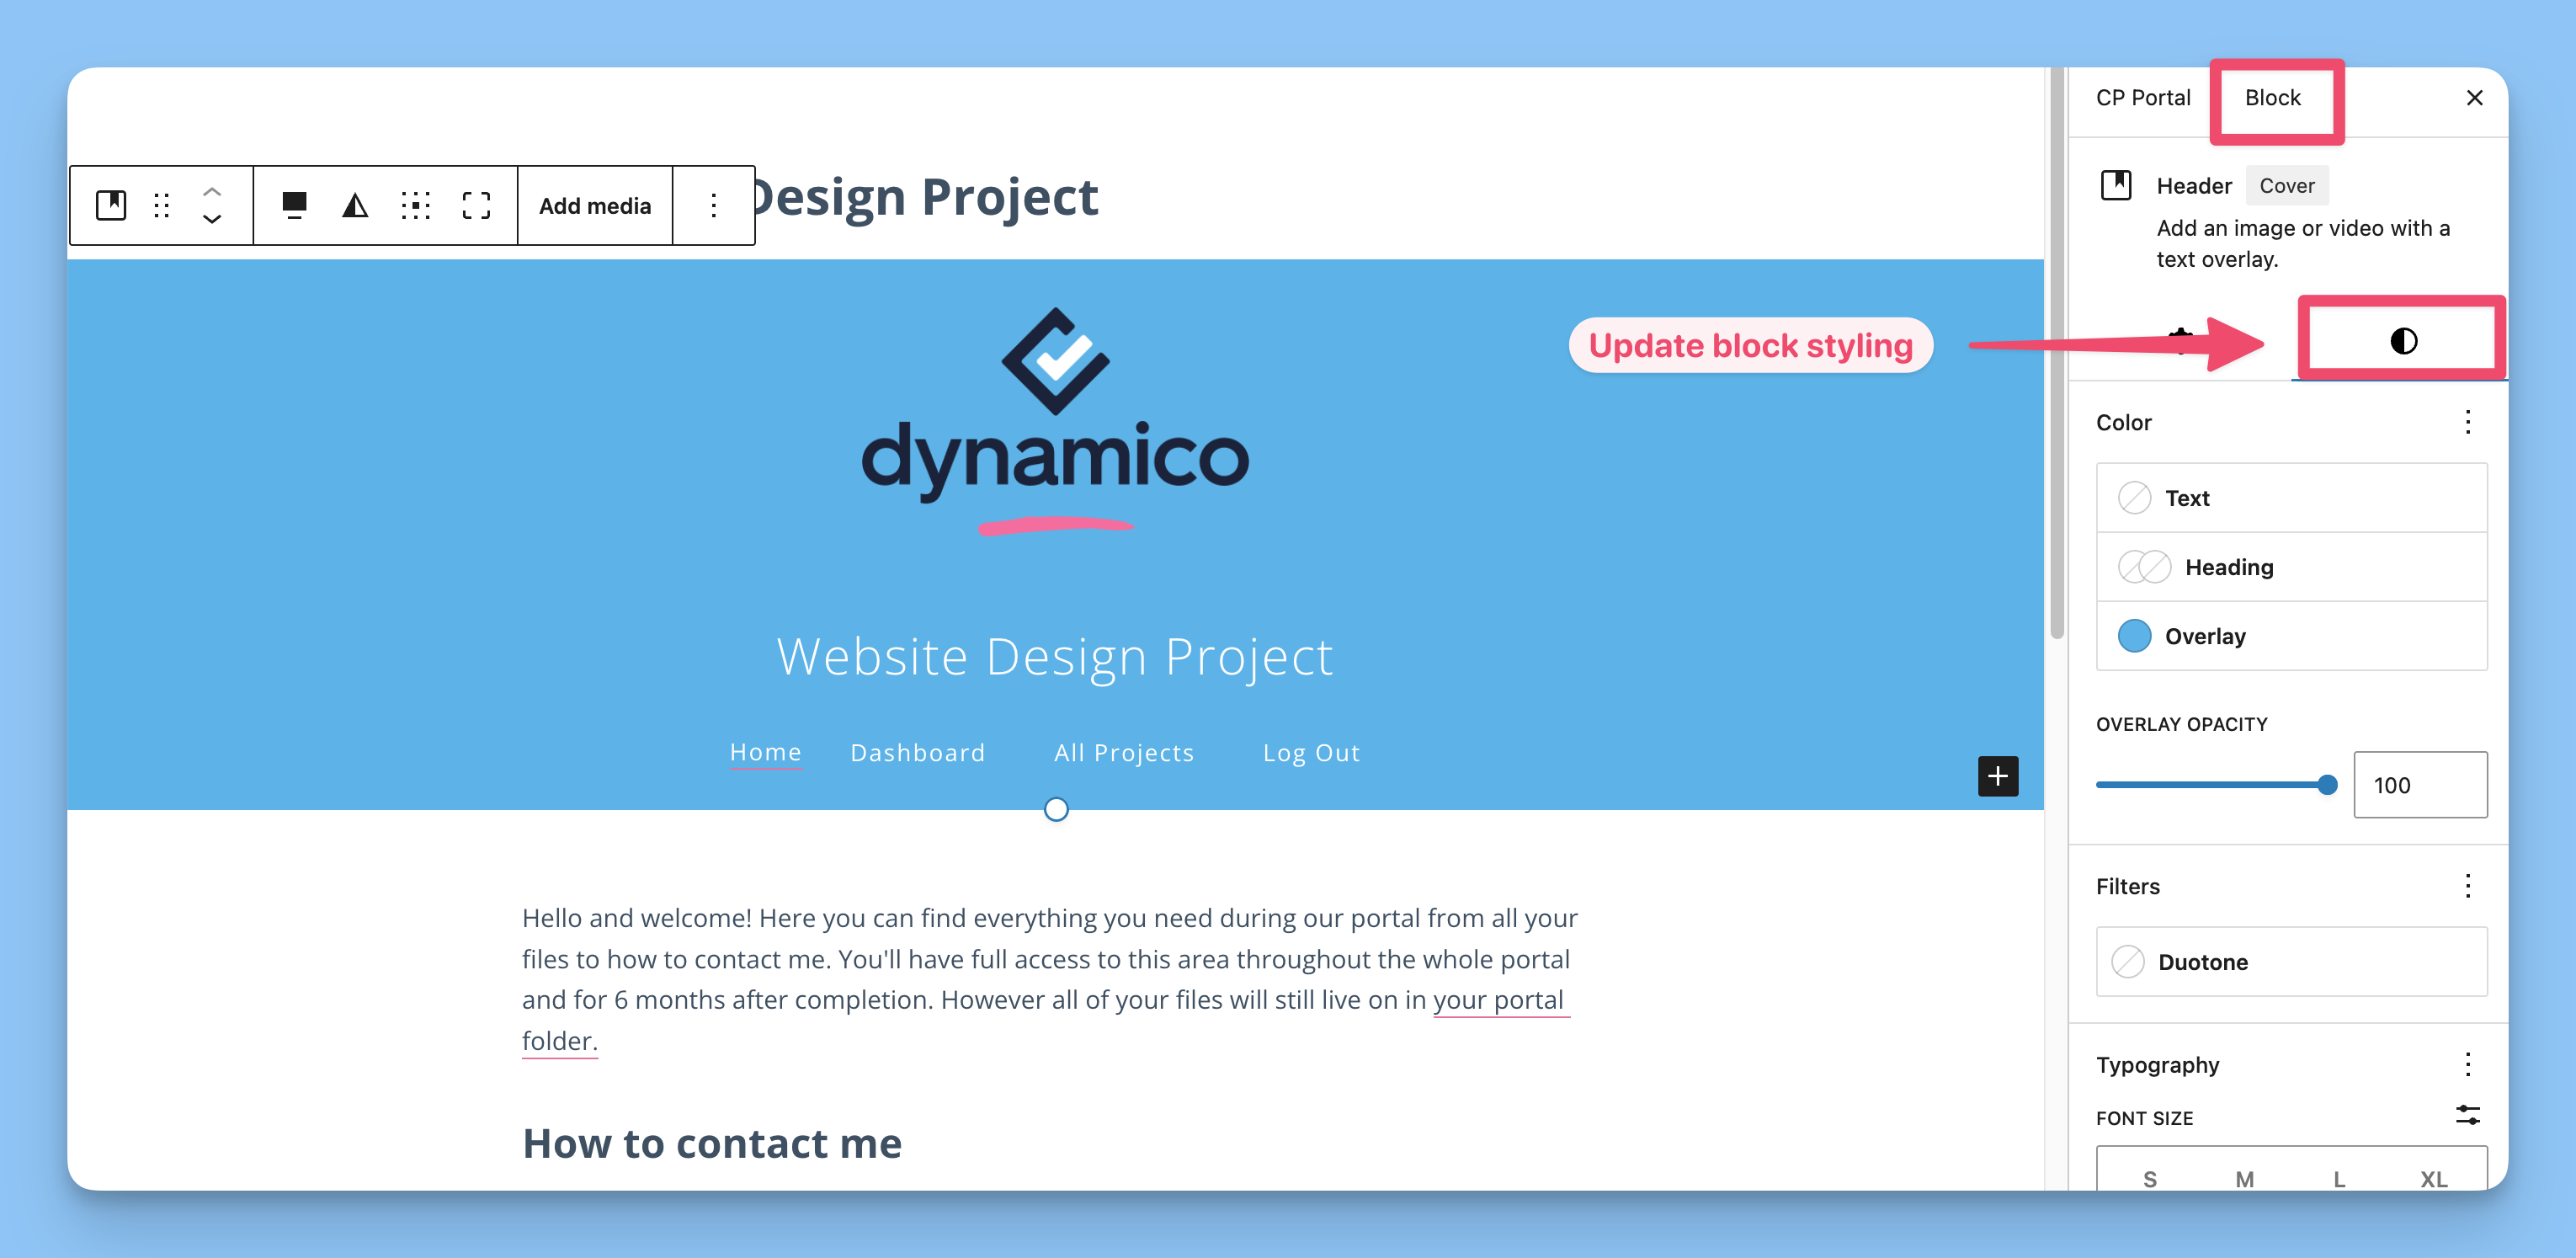
Style individual elements
You can also customize individual blocks by selecting any element and using the Styles tab in the sidebar.
Step 4: Understand portal structure
Portals are organized into phases, and each phase contains modules. This helps you organize files, tasks, and deliverables for clients.
What are modules?
Modules can be one of several types:
URL modules - Link to external or internal URLs
File uploads - Share files with clients behind login. These are the right choice for most client work.
Private file uploads - Share documents with extra URL protection for highly confidential information. These do not support images or audio files.
Client file uploads - Let clients upload their own files
Image slider - Show multiple images in a slider
Text & Media - Show formatted text, images, and YouTube or Vimeo videos in a lightbox, without building a content page
Content pages - Add flexible pages with text, images, videos, forms, and embeds
Not sure whether to use regular file uploads or private file uploads? Learn the difference between the two file upload types and when to use each one.
Module settings
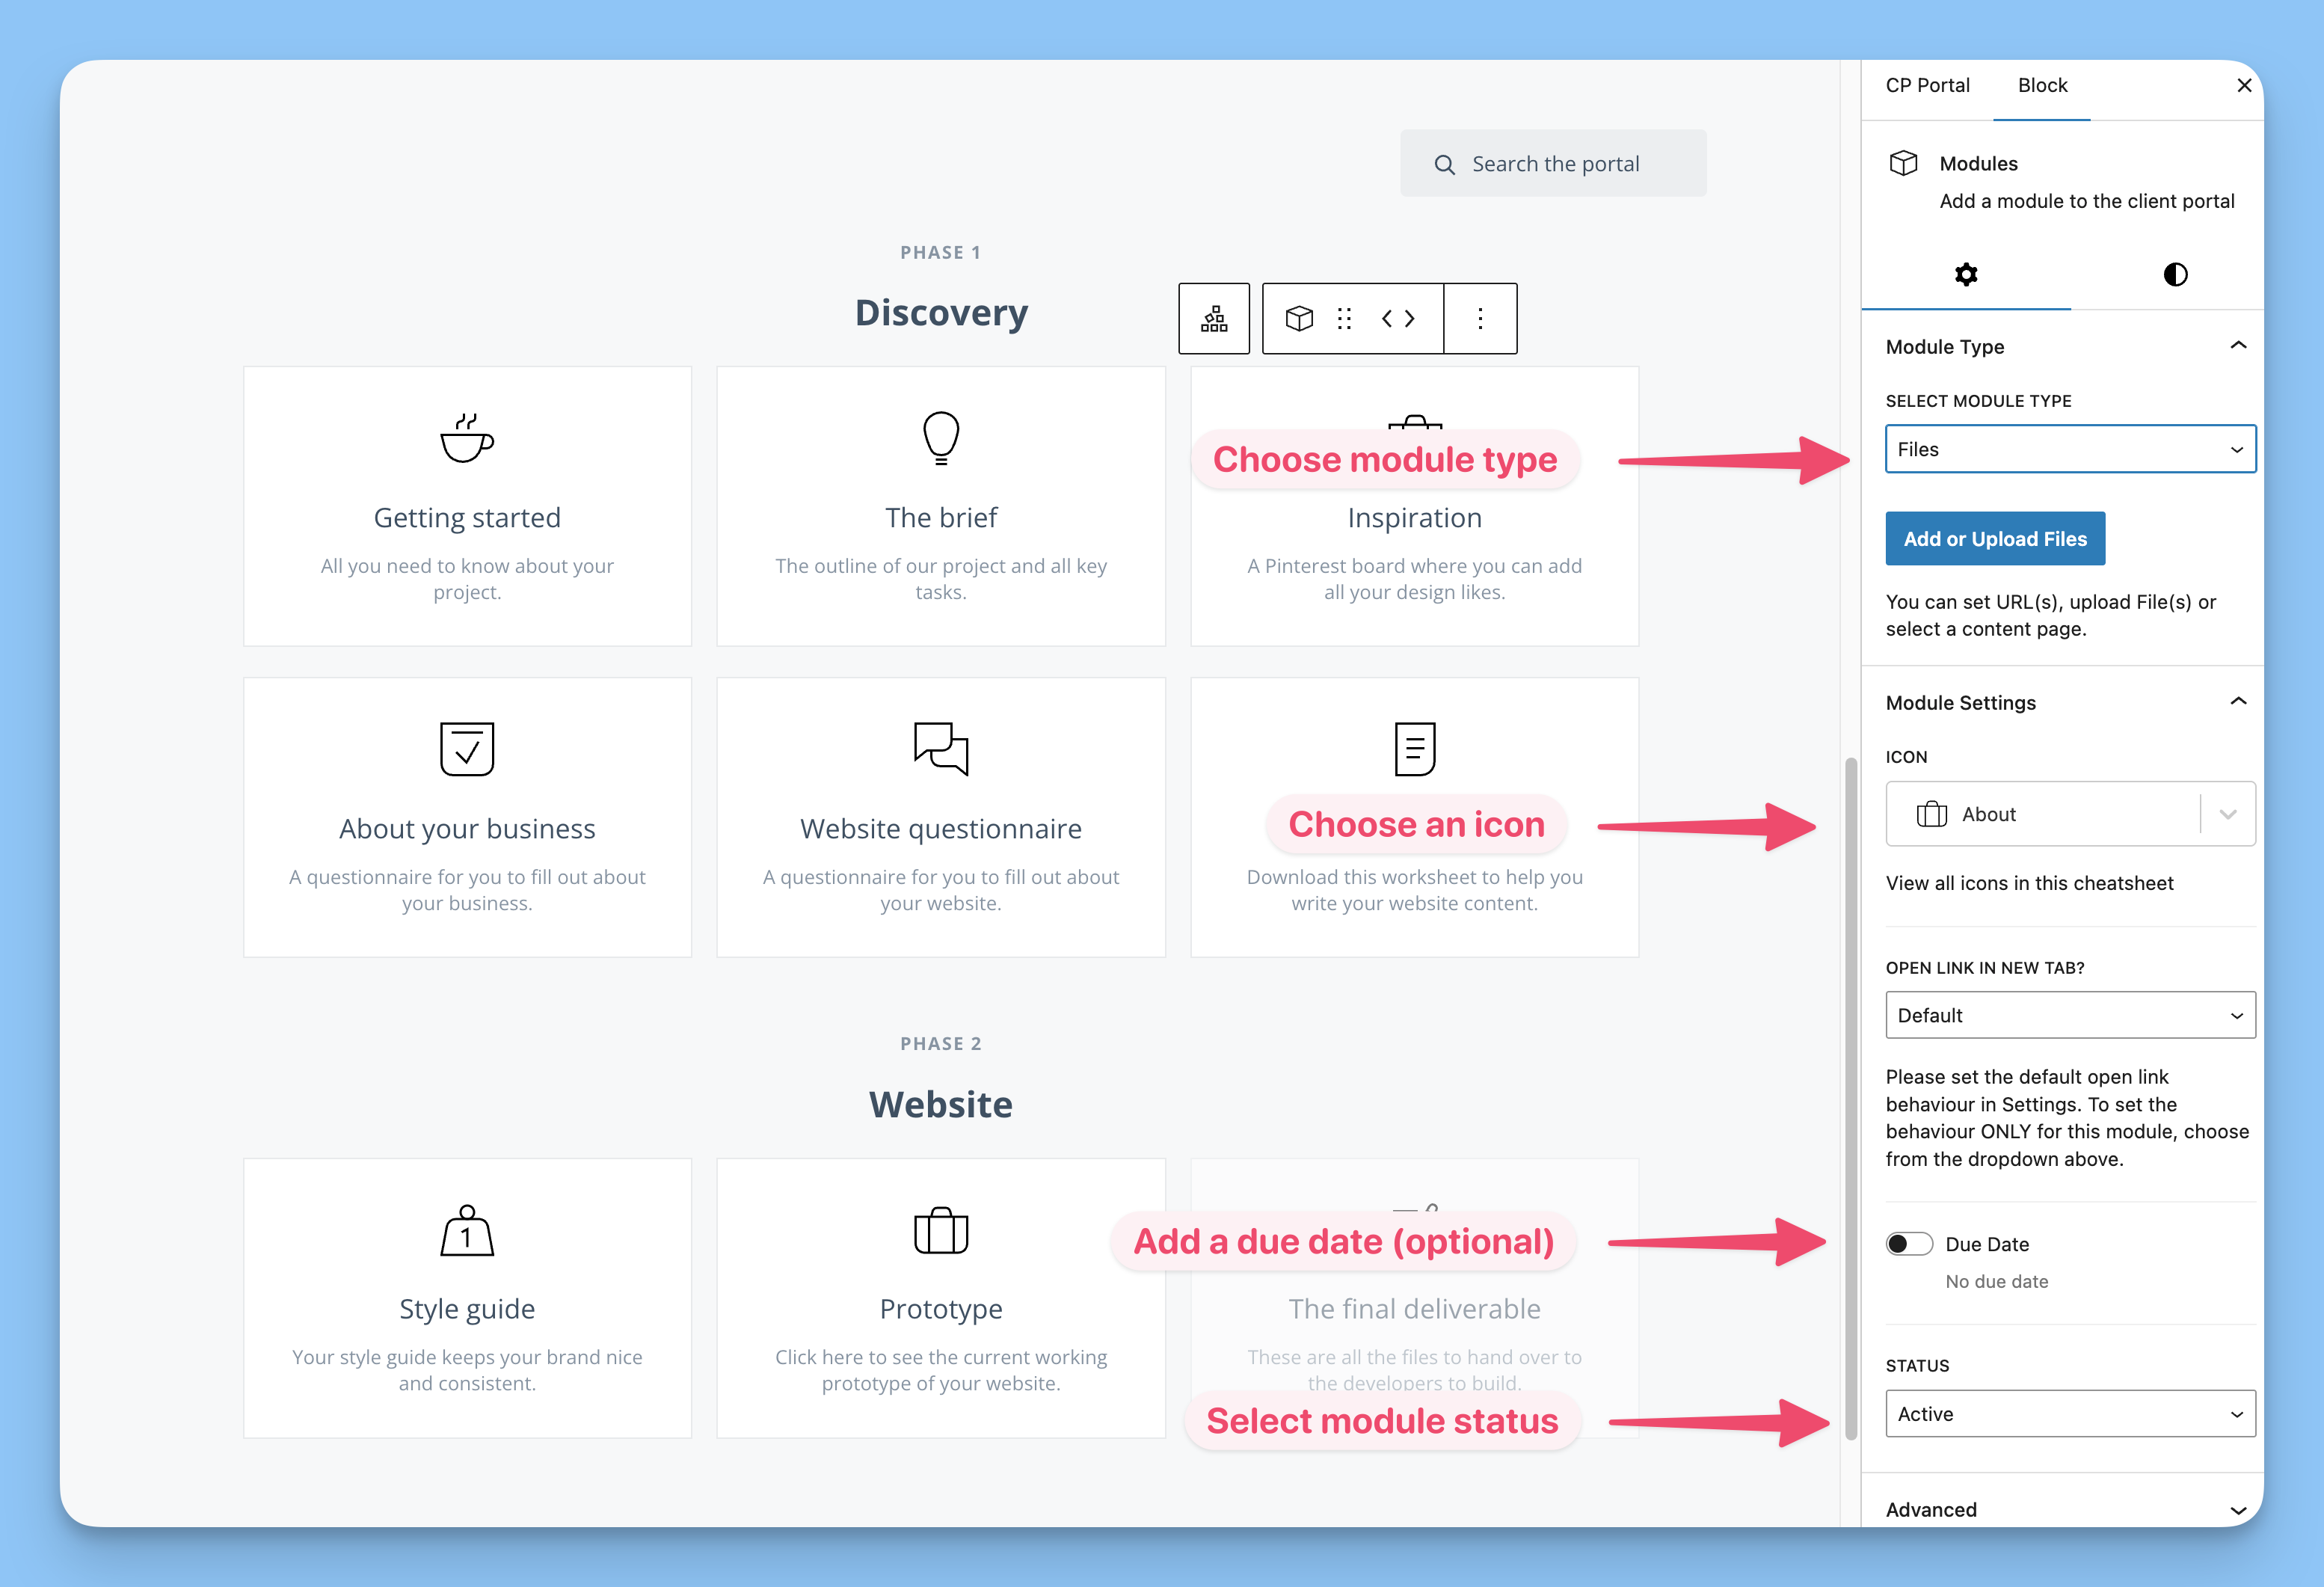
The sidebar contains the settings for each module:
Module type - Choose the module type
Icon - Select a different icon
Due date - Add a deadline with email reminders
Module status - Control how clients interact with it
Module status options
A module can be:
Active - The client can interact with it
Inactive - The client can see it but cannot use it yet
Complete - Shows a checkmark to mark it as finished
Step 5: Add and organize modules
Edit module text
You can type directly in any module to change its text.
Add new modules
Select the phase where you want to add the module.
Click the plus icon at the bottom of the phase.
Remove modules
Select the module.
Open the menu with the three dots.
Choose Delete.
Step 6: Add and customize content blocks
Every block in your portal can be edited, removed, reordered, or added. There are three ways to add new blocks.
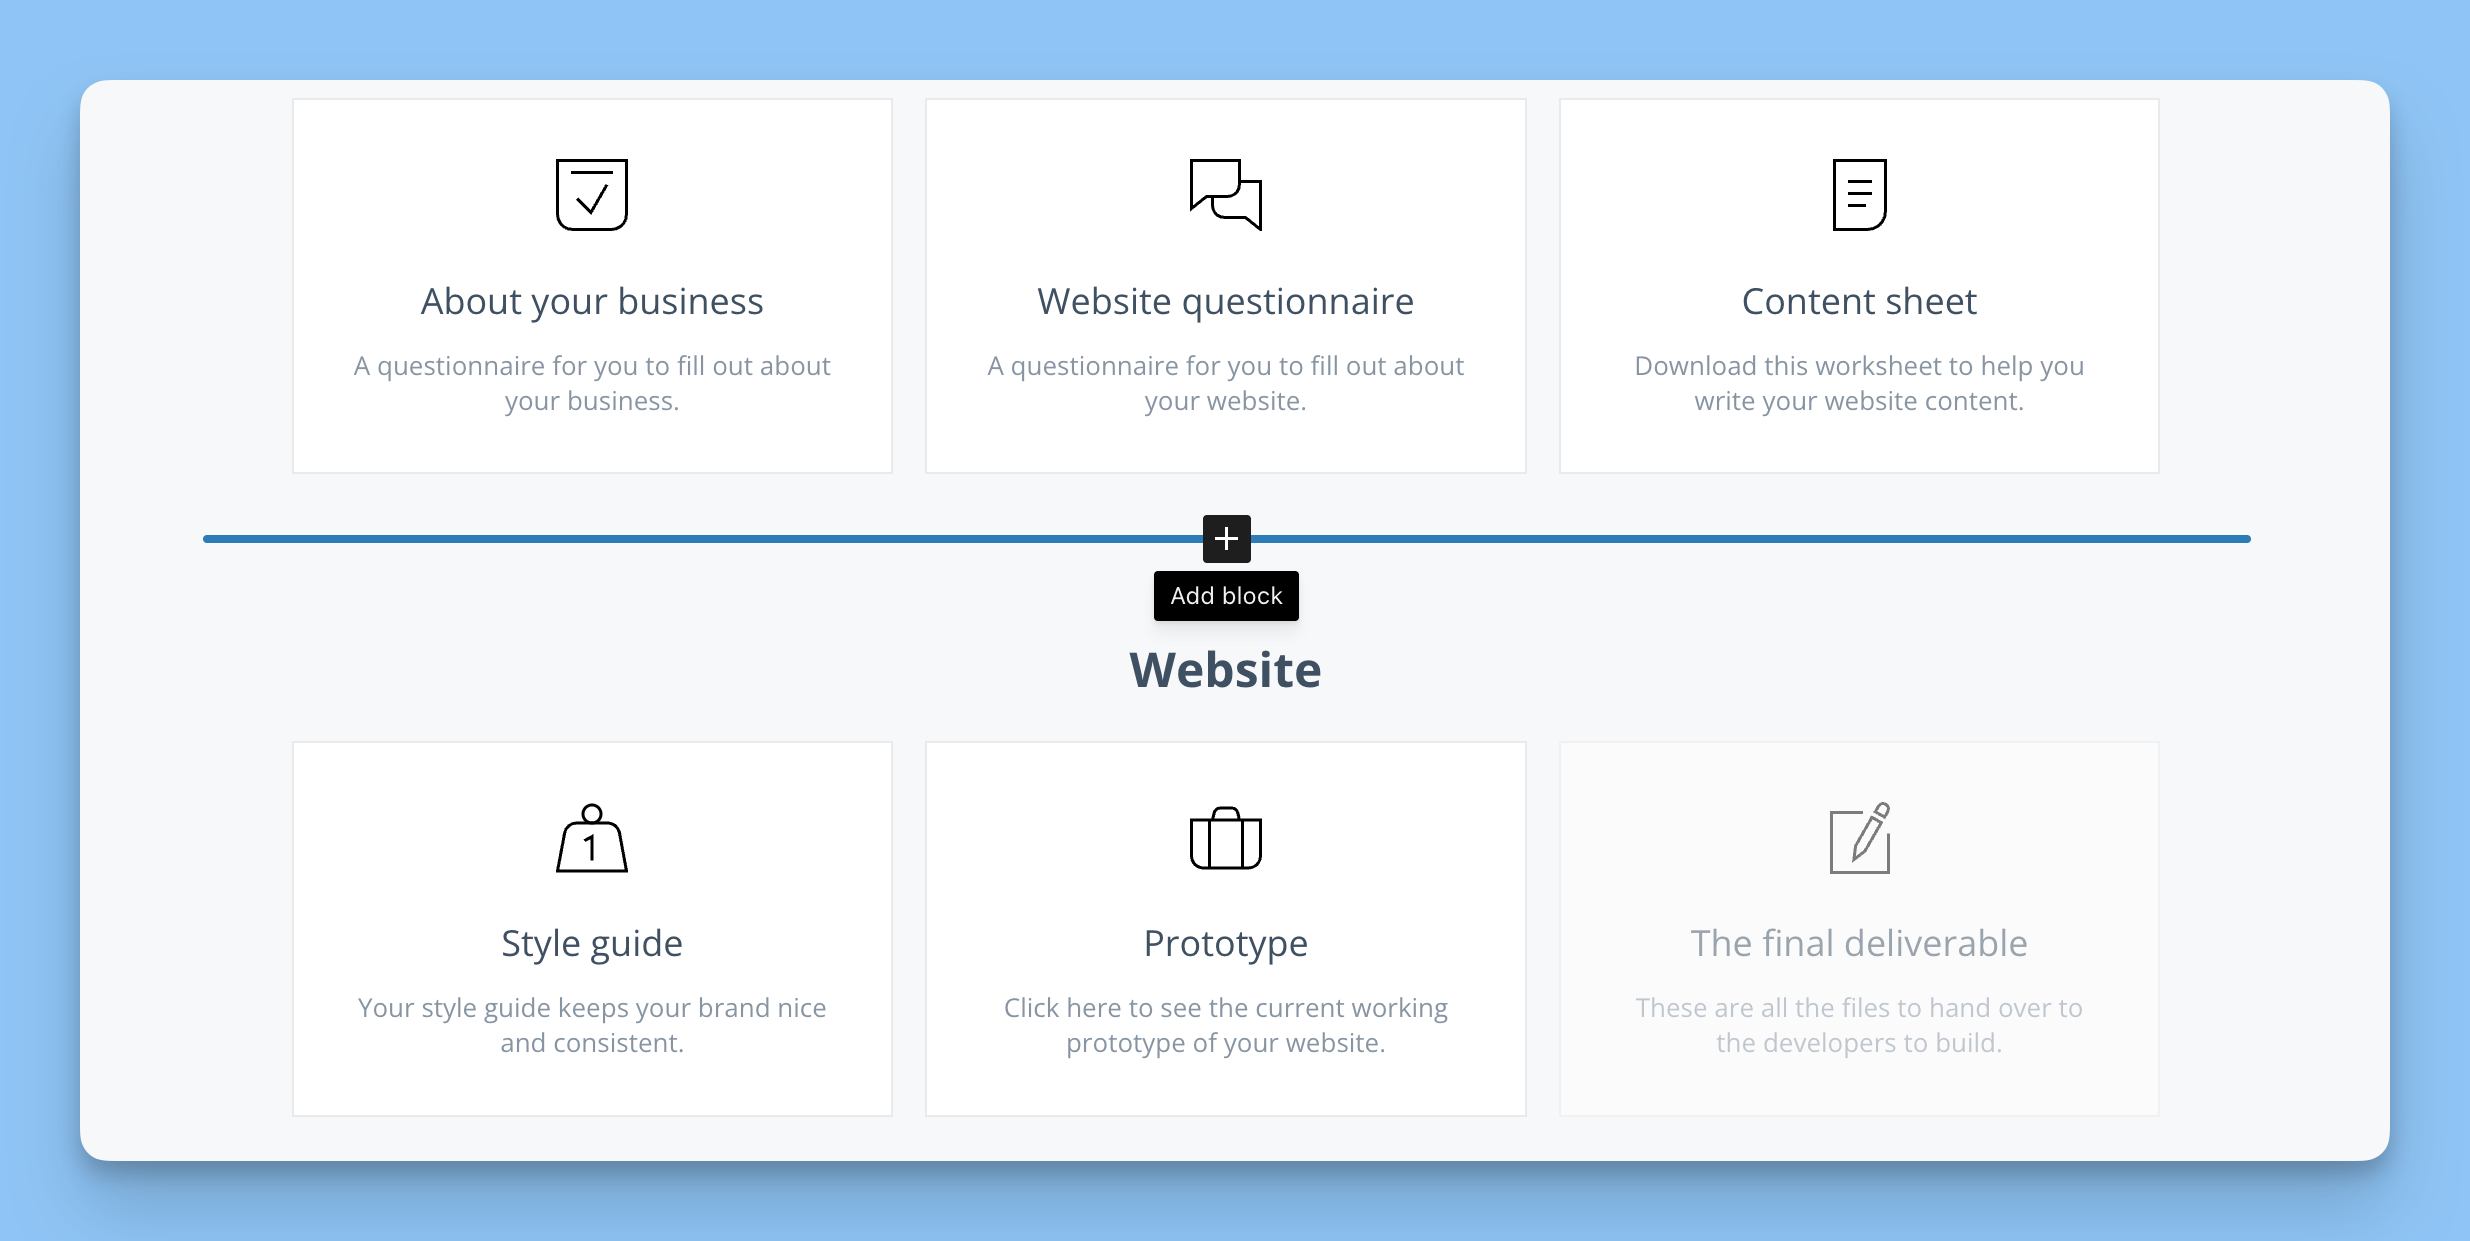
Method 1: Plus icon
Move your cursor where you want to add a block and click the plus icon.
Method 2: Add before or after
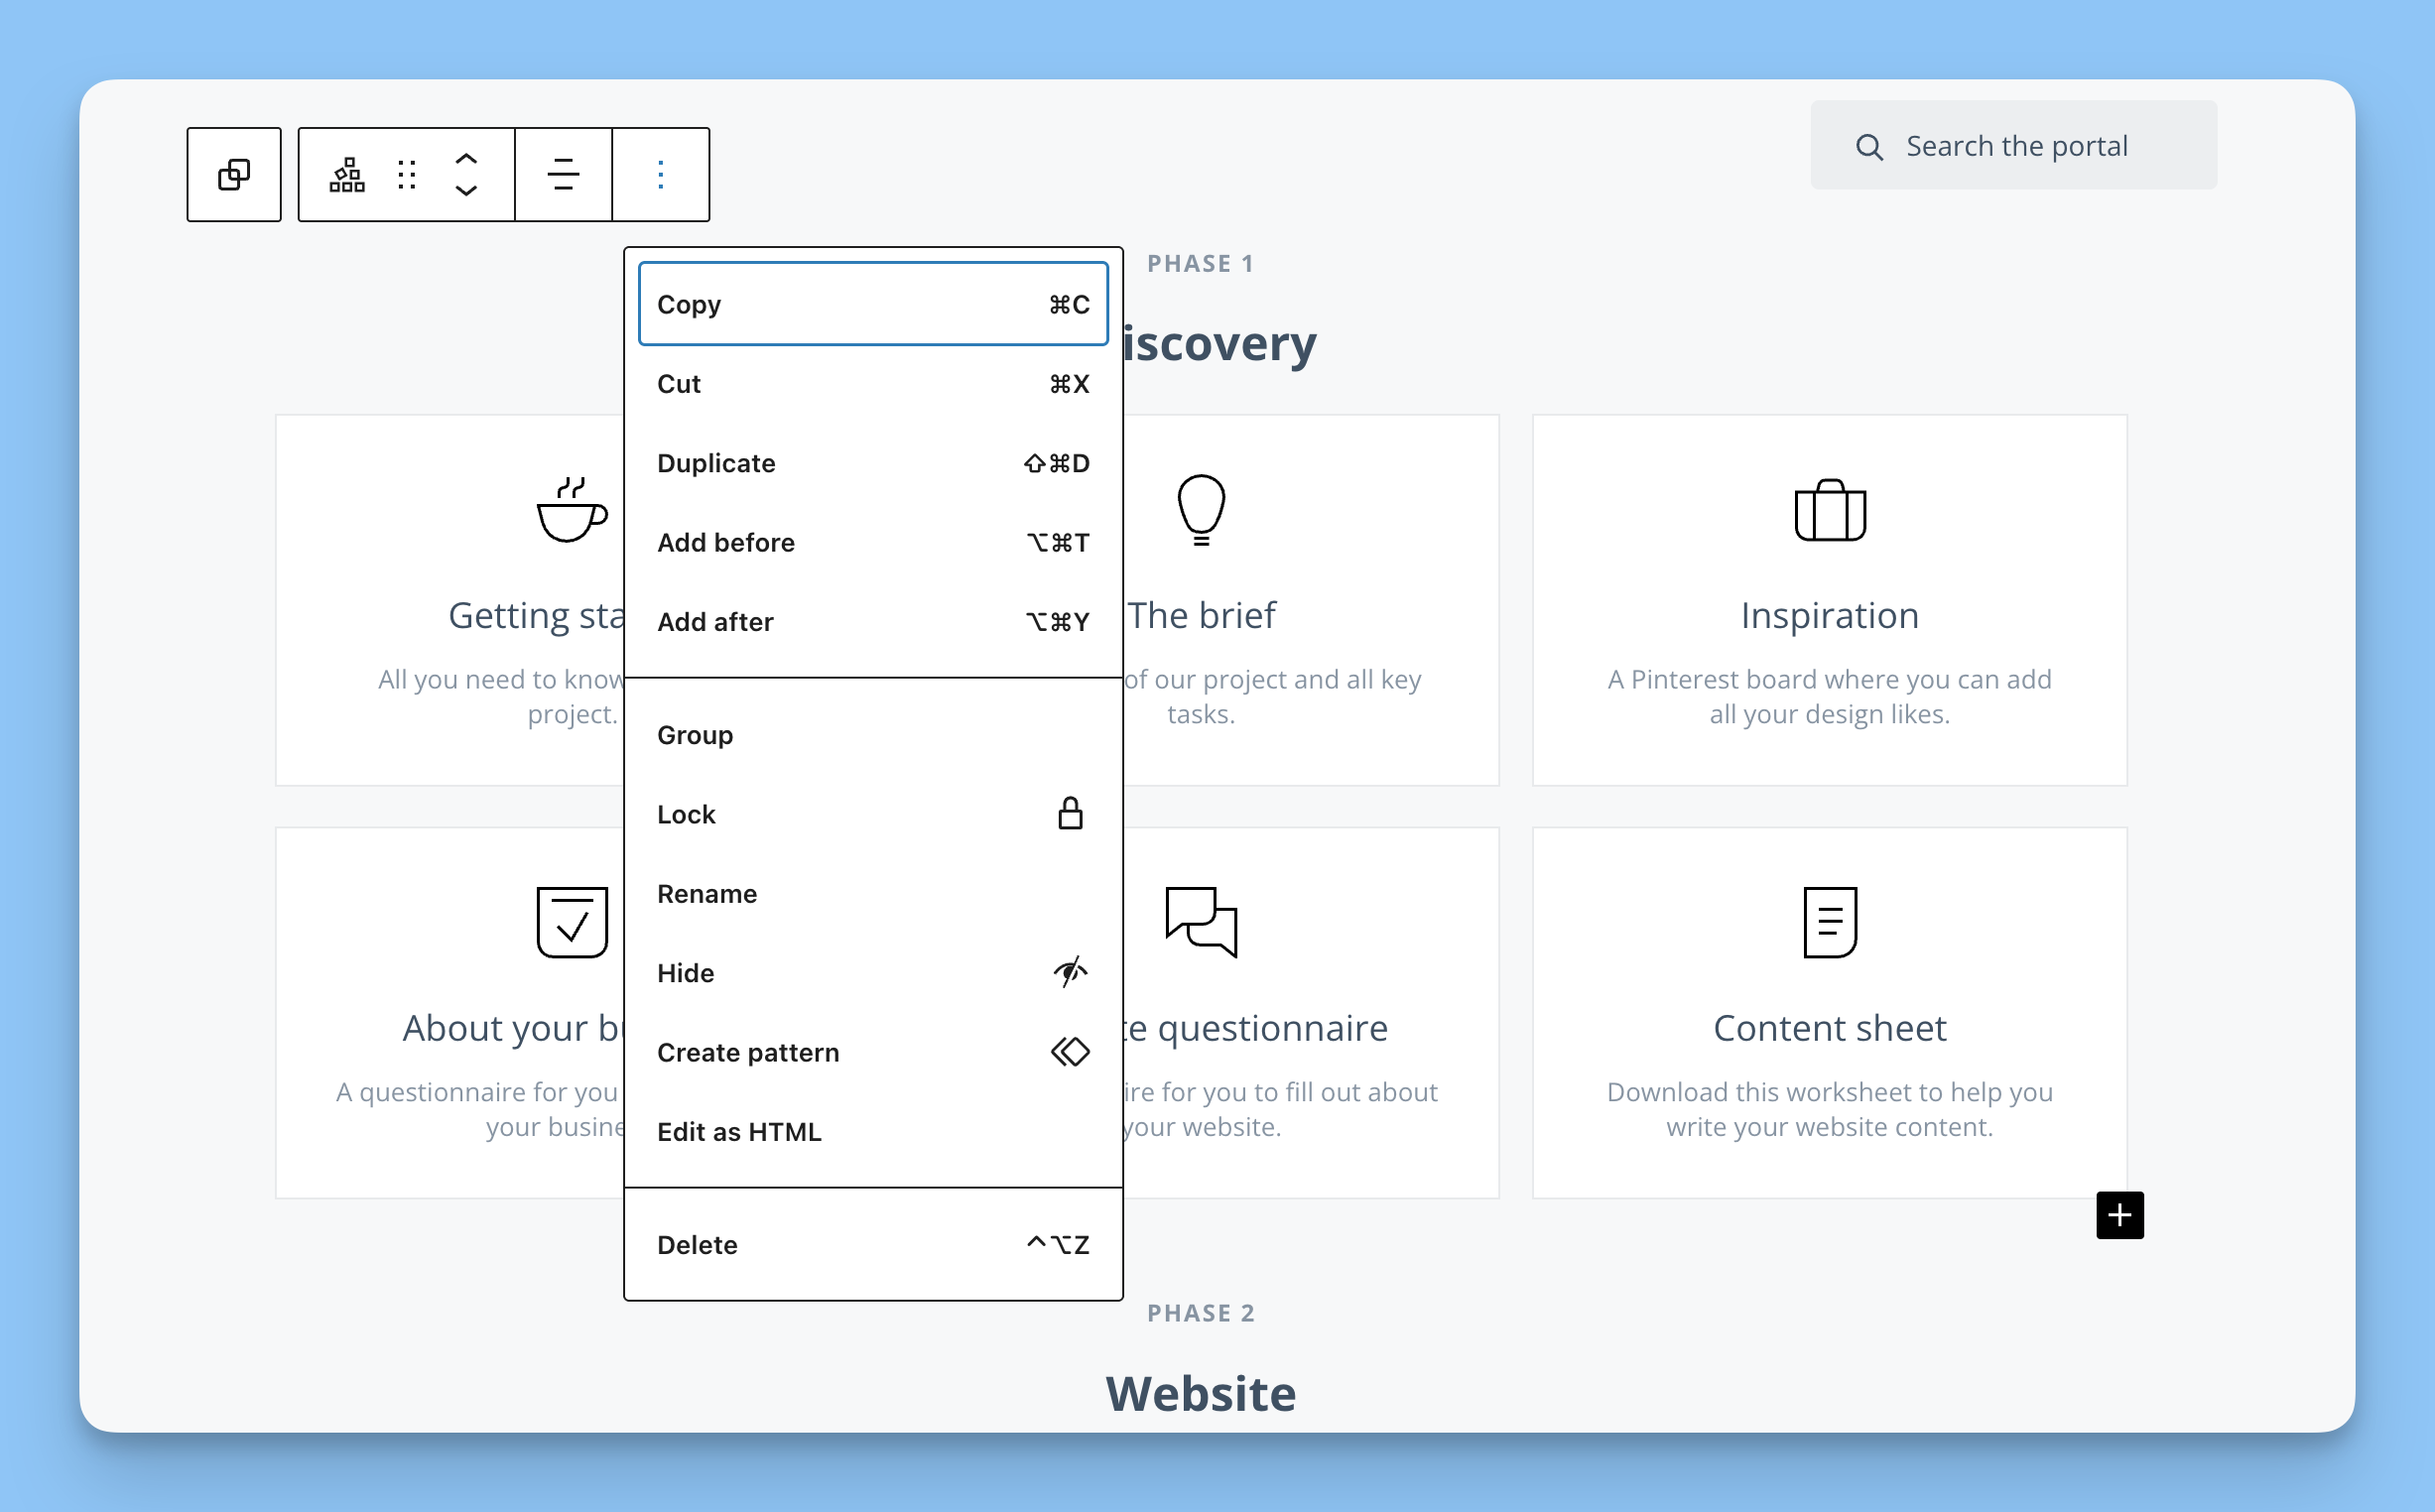
Select the block above or below where you want to add content.
Click the menu with the three dots.
Choose Add before or Add after.
Method 3: Document overview
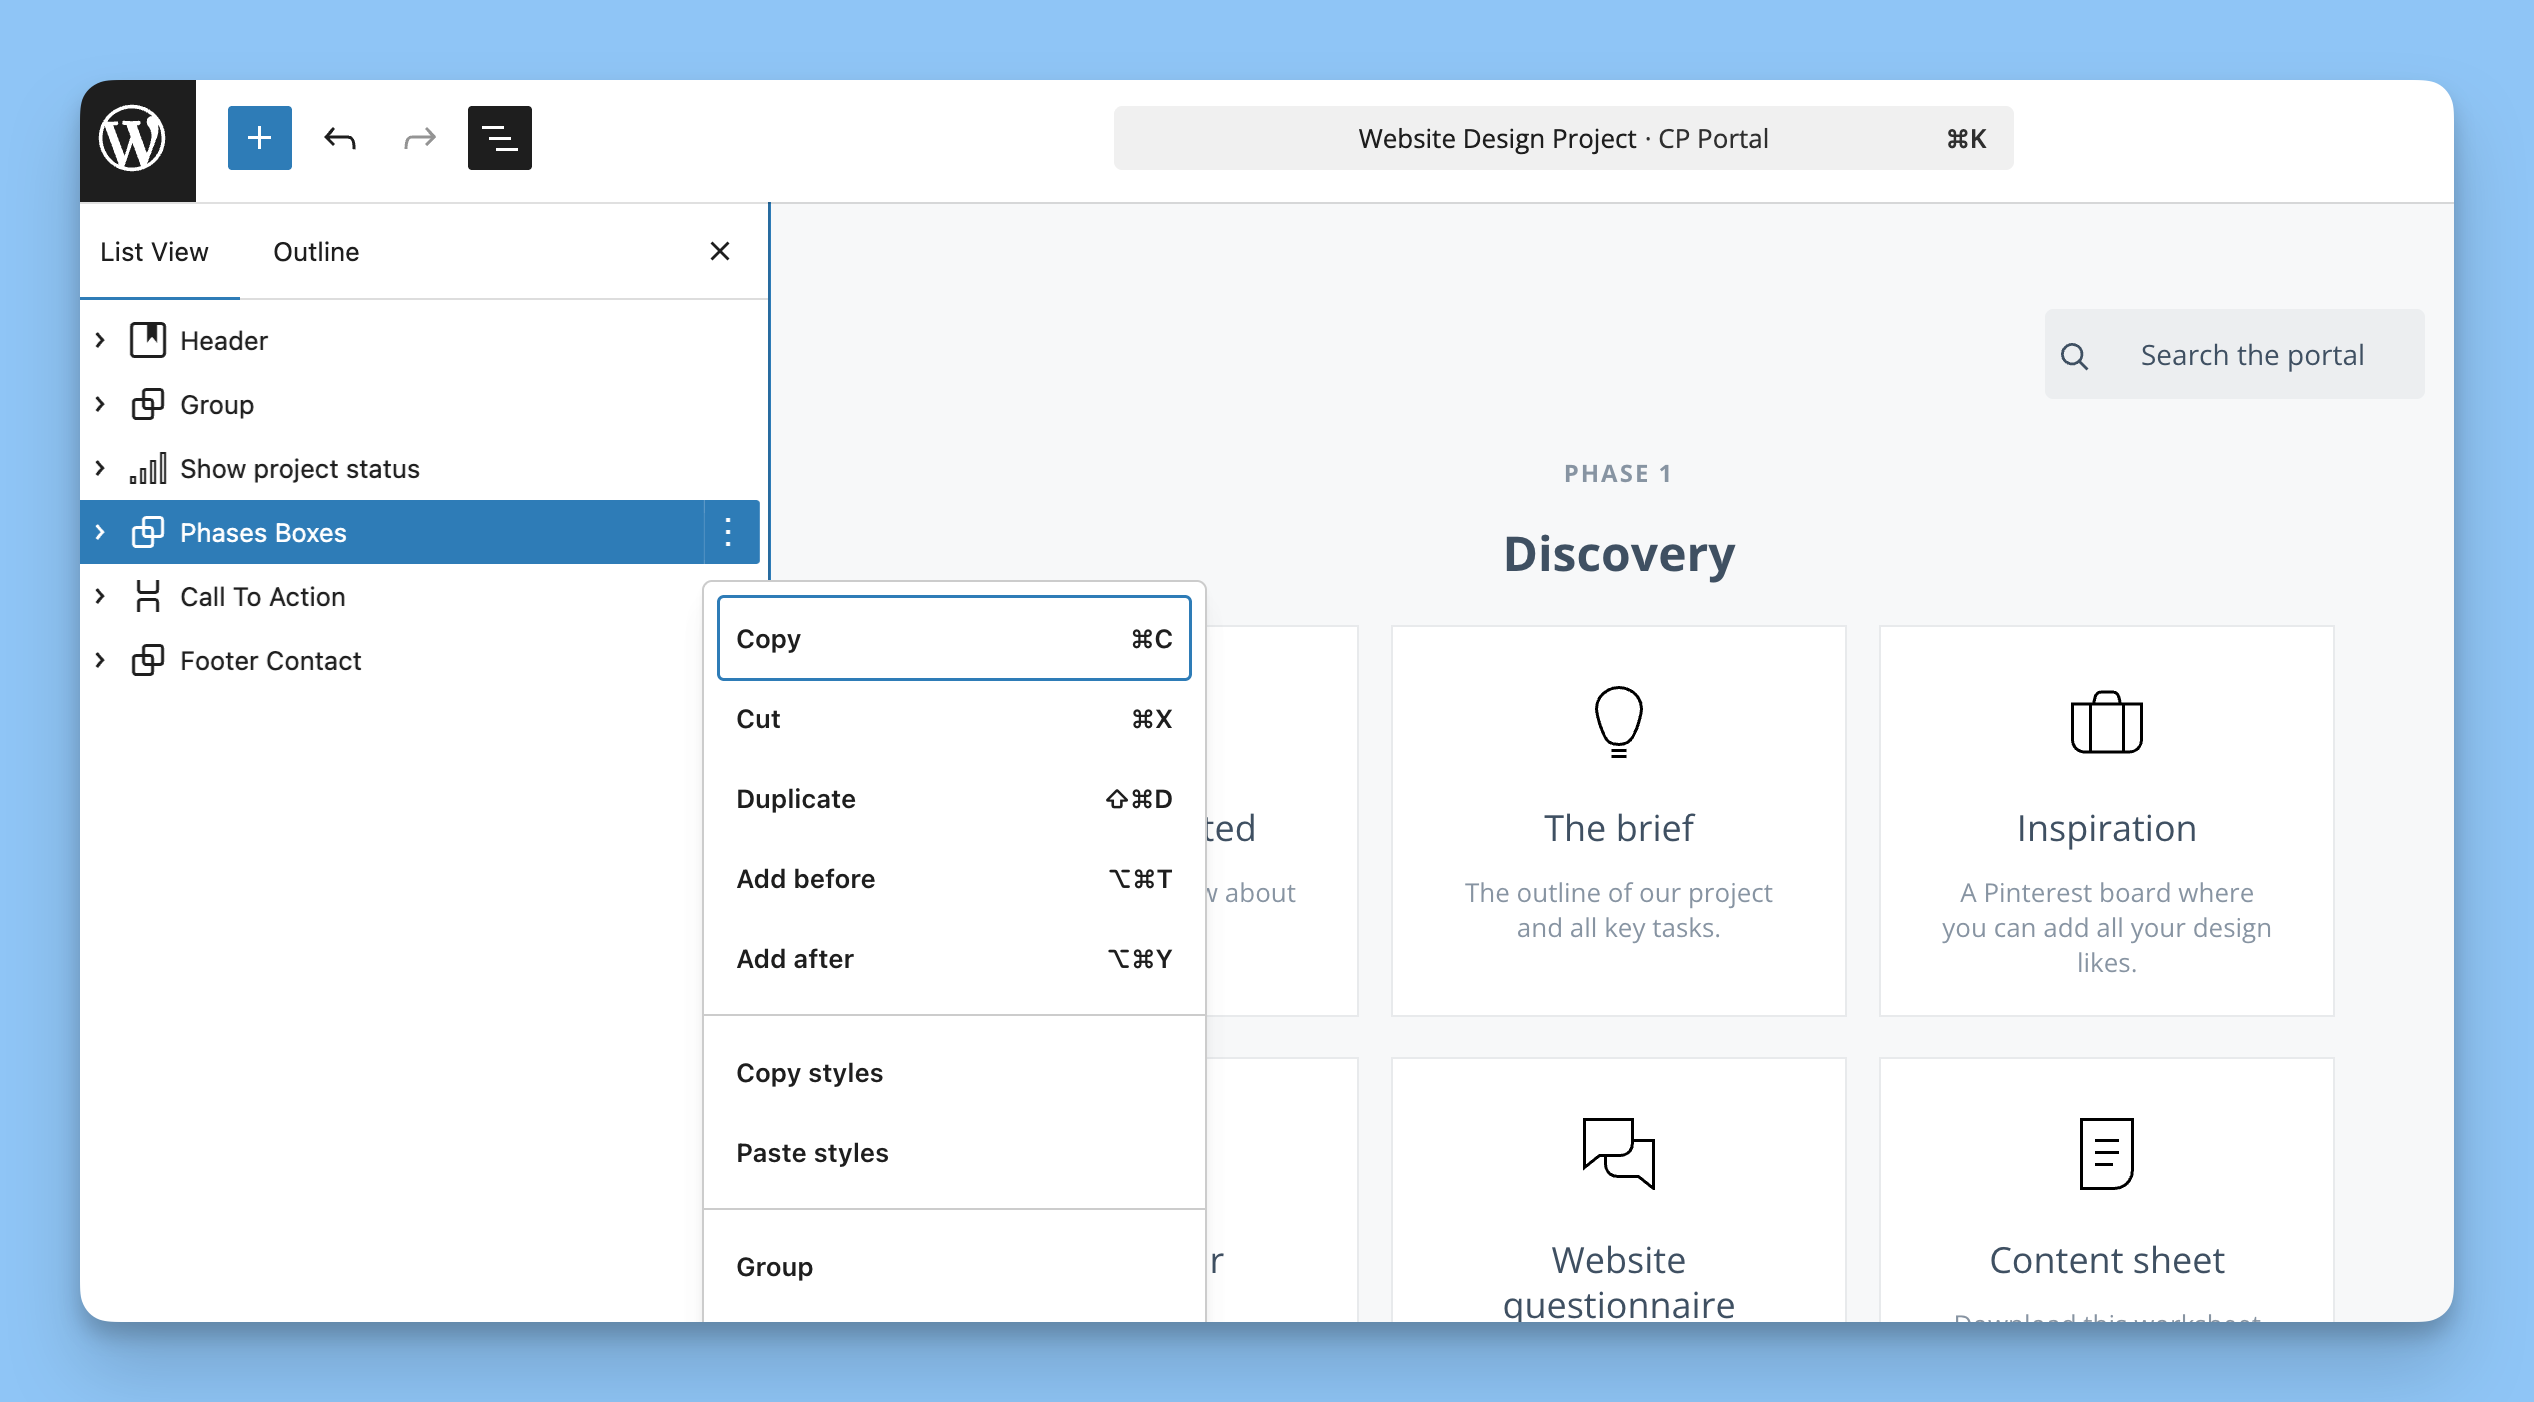
Use the document overview panel to add blocks from a higher-level view.
Adding a new phase
Click the phase above where you want the new one.
Choose Select Parent Block.
Open the menu and click Add After.
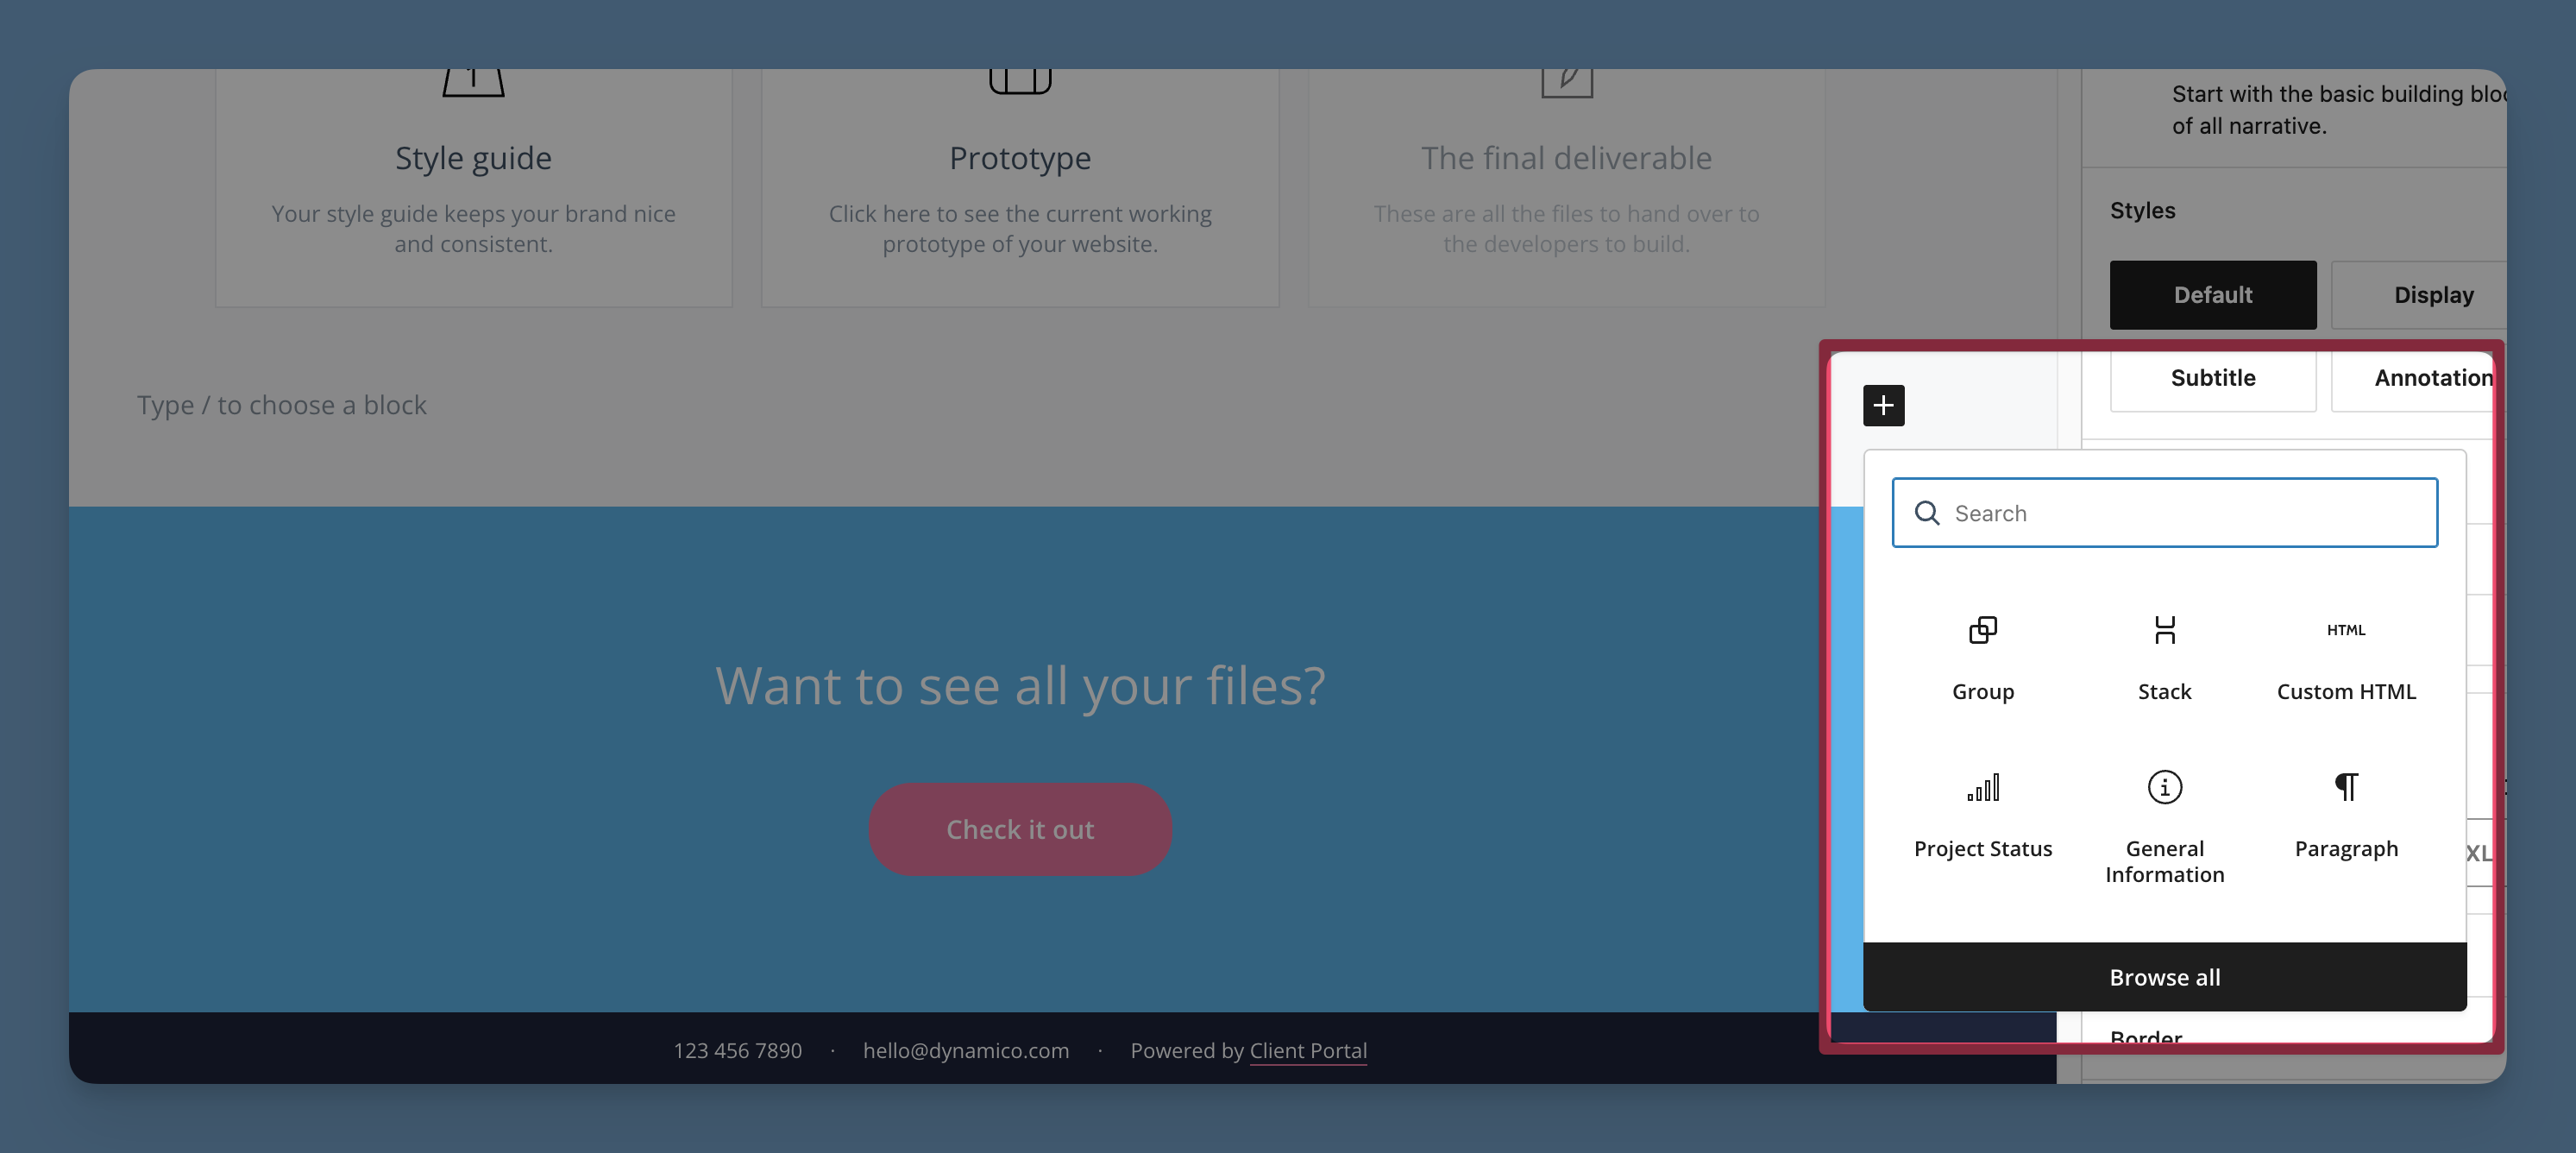
Click the plus icon and choose Browse all.
Scroll down to Client Portal to see all available blocks.
Click Phases to add a new phase.
Type a forward slash (/) to quickly add common blocks, or use the plus icon to browse all blocks.
Step 7: Customize special content blocks
Project information section
Use this section for a welcome message, contact information, or anything you want clients to see first.
For example, you might include:
A personalized welcome message
How to contact you
Business hours or other important information
Embed videos and other content
Type a forward slash and choose Embed.
Paste a YouTube link or most other video links directly.
For other embeds, choose Custom HTML to paste embed codes for forms, spreadsheets, and more.
Project status blocks
By default, project status blocks show the current phase, next phase, and estimated completion date. You can change these labels to fit your workflow.
For example, a doggy daycare might rename them to:
Pet owner name
Favorite toy
Birthday, using the date picker
Manage status blocks
Add blocks - Add as many as you need
Remove blocks - Open the menu and choose Delete
Reorder blocks - Select the block and drag it
Adjust columns - Select the full block container to change the number of columns
Call to action section
Use the call to action section to add a link or button that encourages the client to do something next.
For example, you might add:
A booking link
Contact information
An upsell offer
A live feed or dashboard
Any other next step you want clients to take
A doggy daycare, for example, might link to a live camera feed so pet parents can check in any time.
Step 8: Preview your portal
Once your portal is ready, preview it from your client's perspective.
Click the preview icon in the toolbar to see what the portal will look like for clients.
By default, portals can only be viewed by logged-in administrators on your WordPress site and any clients assigned to the portal.
Step 9: Publish and add clients
When you're ready to share the portal:
Click Publish.
Add clients to the portal so they can access it.
That's it. Your first portal is live, and your client can now log in to see their dashboard, files, and resources.
Next steps
Now that your first portal is ready, continue with:
Check out our free workshop and planning template to help you design effective portals that your clients will love.