Back to Project
Getting Started
- How to install Client Portal
- Can I use it without WordPress?
- Setting up your first portal
- Using content pages
- Importing and Exporting Portals
- Icon Cheatsheet
- Using Templates
Customisation
- How to change the fonts in Client Portal?
- How to change the 'Client Portal Archive' text
- Customizing the Client Portal login page
- Change the error message for a failed login attempt
- Redirect to a different page after logging out
- How to change the slug/permalink
Troubleshooting
- I’m not getting Client Portal updates
- I'm getting a 404 error message
- I'm getting an Nginx error message
- Excluding Client Portal from your cache
- Forgot password isn't working
- I'm not receiving Email Notifications
Security
- Are my files safe in Client Portal?
- How do I hide Client Portal from search results?
- How do private file uploads work
Users & roles
- How do I add a new user to Client Portal?
- Using multiple or different roles
- How users can self-signup to a portal
Working with Client Portal
- Introducing Client Portal to your clients
- How clients can mark as complete
- Create a to-do list with Google Sheets
- Accepting file uploads in Client Portal
- Collate notifications into digests
- Add due dates and reminders
Integrations
Legacy Documentation
How do I add or move Phases
I can't find it anymore! How do I manage phases?
With update 4.4.0 on November 15, 2018, the Manage Phases button was moved.
The button was previously on the project edit screen. You can now find it on the Project list. When you hover the project names you'll see it in the action links.
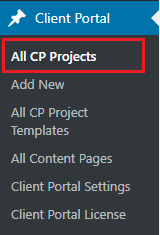
Start by viewing All CP Projects. In the list, hover over the title of the project where you want to add or remove phases. When you hover the title, the action links will appear. Select Manage Phases.

You can add and remove phases, as well as change the order and update the phase titles.
How to move phases
When you click Manage Phases, you'll see all of the phases.
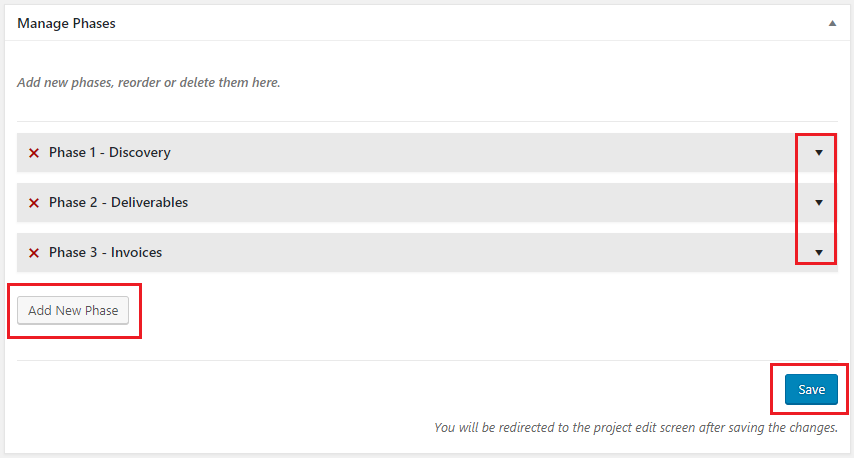
- Click 'Add New Phase' to add more phases to your project.
- Click the arrows on the right to expand the view of each individual phase. This is where you can go into the phase to re-name it, move it, or delete it.
- Remember to always save your changes!
When you expand the view of a phase
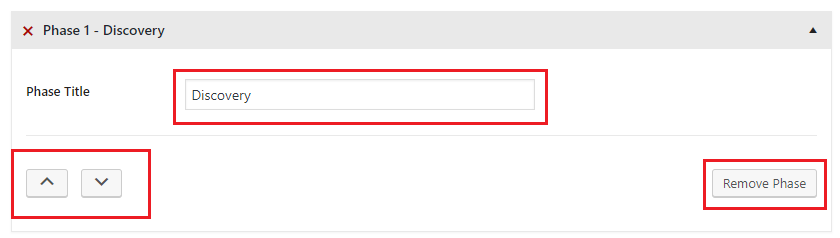
- You can change the name.
- You can delete it by clicking 'Remove Phase'.
- And you can re-order the phases.
If you want to re-order the phases, notice that you'll only click the arrow once. If you want to move it more places in a direction, you'll need to go to the phase again and click the arrow again, only one more time. You won't continue to click the same arrow several times, because once you click it, it moves, so you need to move with it.